IOD Retirement

The Painted Bench

January 15, 2021


Its party time at Iron Orchid Designs and its discount time at The Painted Bench!  Each and every one of the retired designs will be 20% off until Monday January 18.  Some quantities are limited and backorders will not be available, once they’re gone they’re gone!  Find your favourites here and place your order today!

Everything is available for curbside pickup or for shipping across Canada and the US.


IOD Botanical Tutorial

The Painted BenchMay 10, 2020


IOD Botanical Tutorial

Yesterday I posted a Facebook Live that really got my creative juices flowing.  Carmen from Carmen’s Curiosity Shop in Colorado has the most amazing imagination and she is sure to come up with something gorgeous every time she adds a post to her facebook page!  Watch the video here and then follow along with my take on this project.

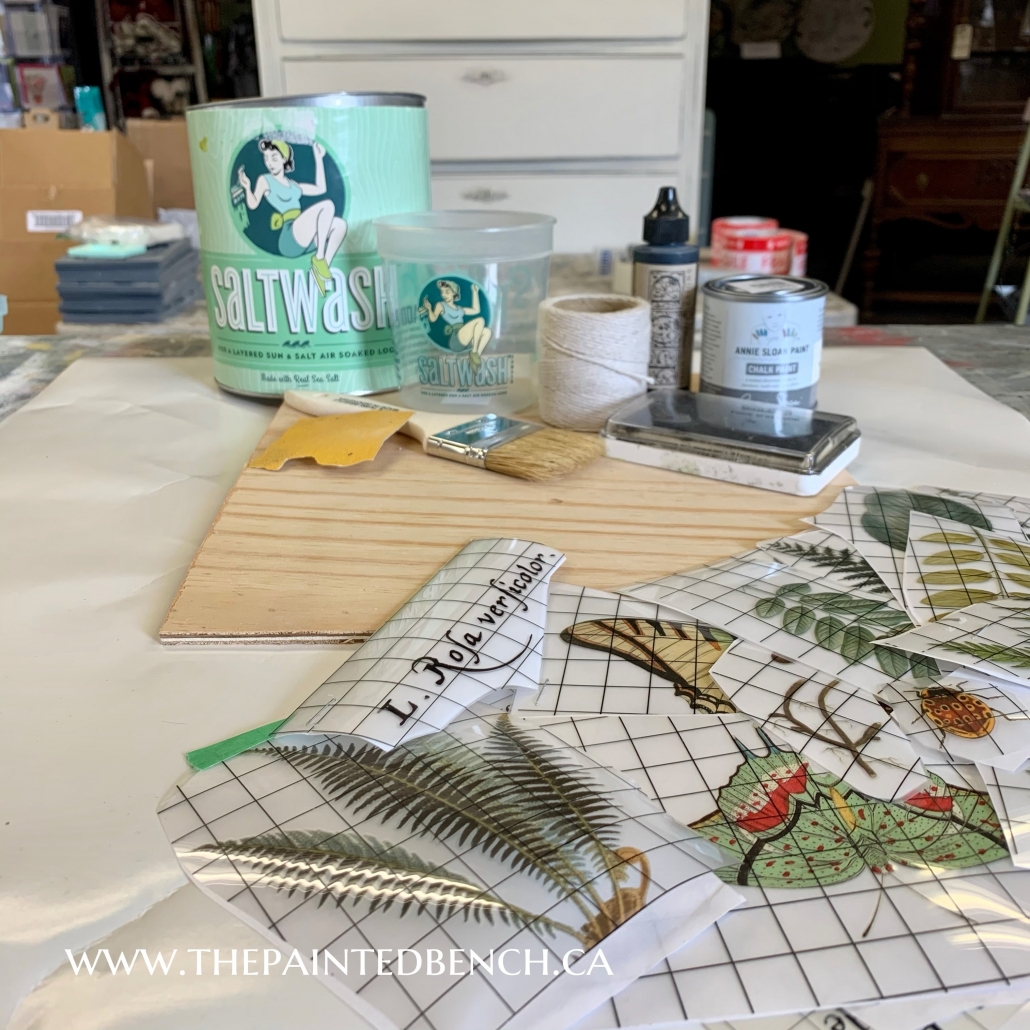
I was at the shop waiting for people to pick up their orders and I thought why not create something beautiful.  I gathered up my supplies and got to work.  The whole project took me under two hours but I probably should have waited a little longer between the Saltwash layer, Flat Out Flat and the transfers.

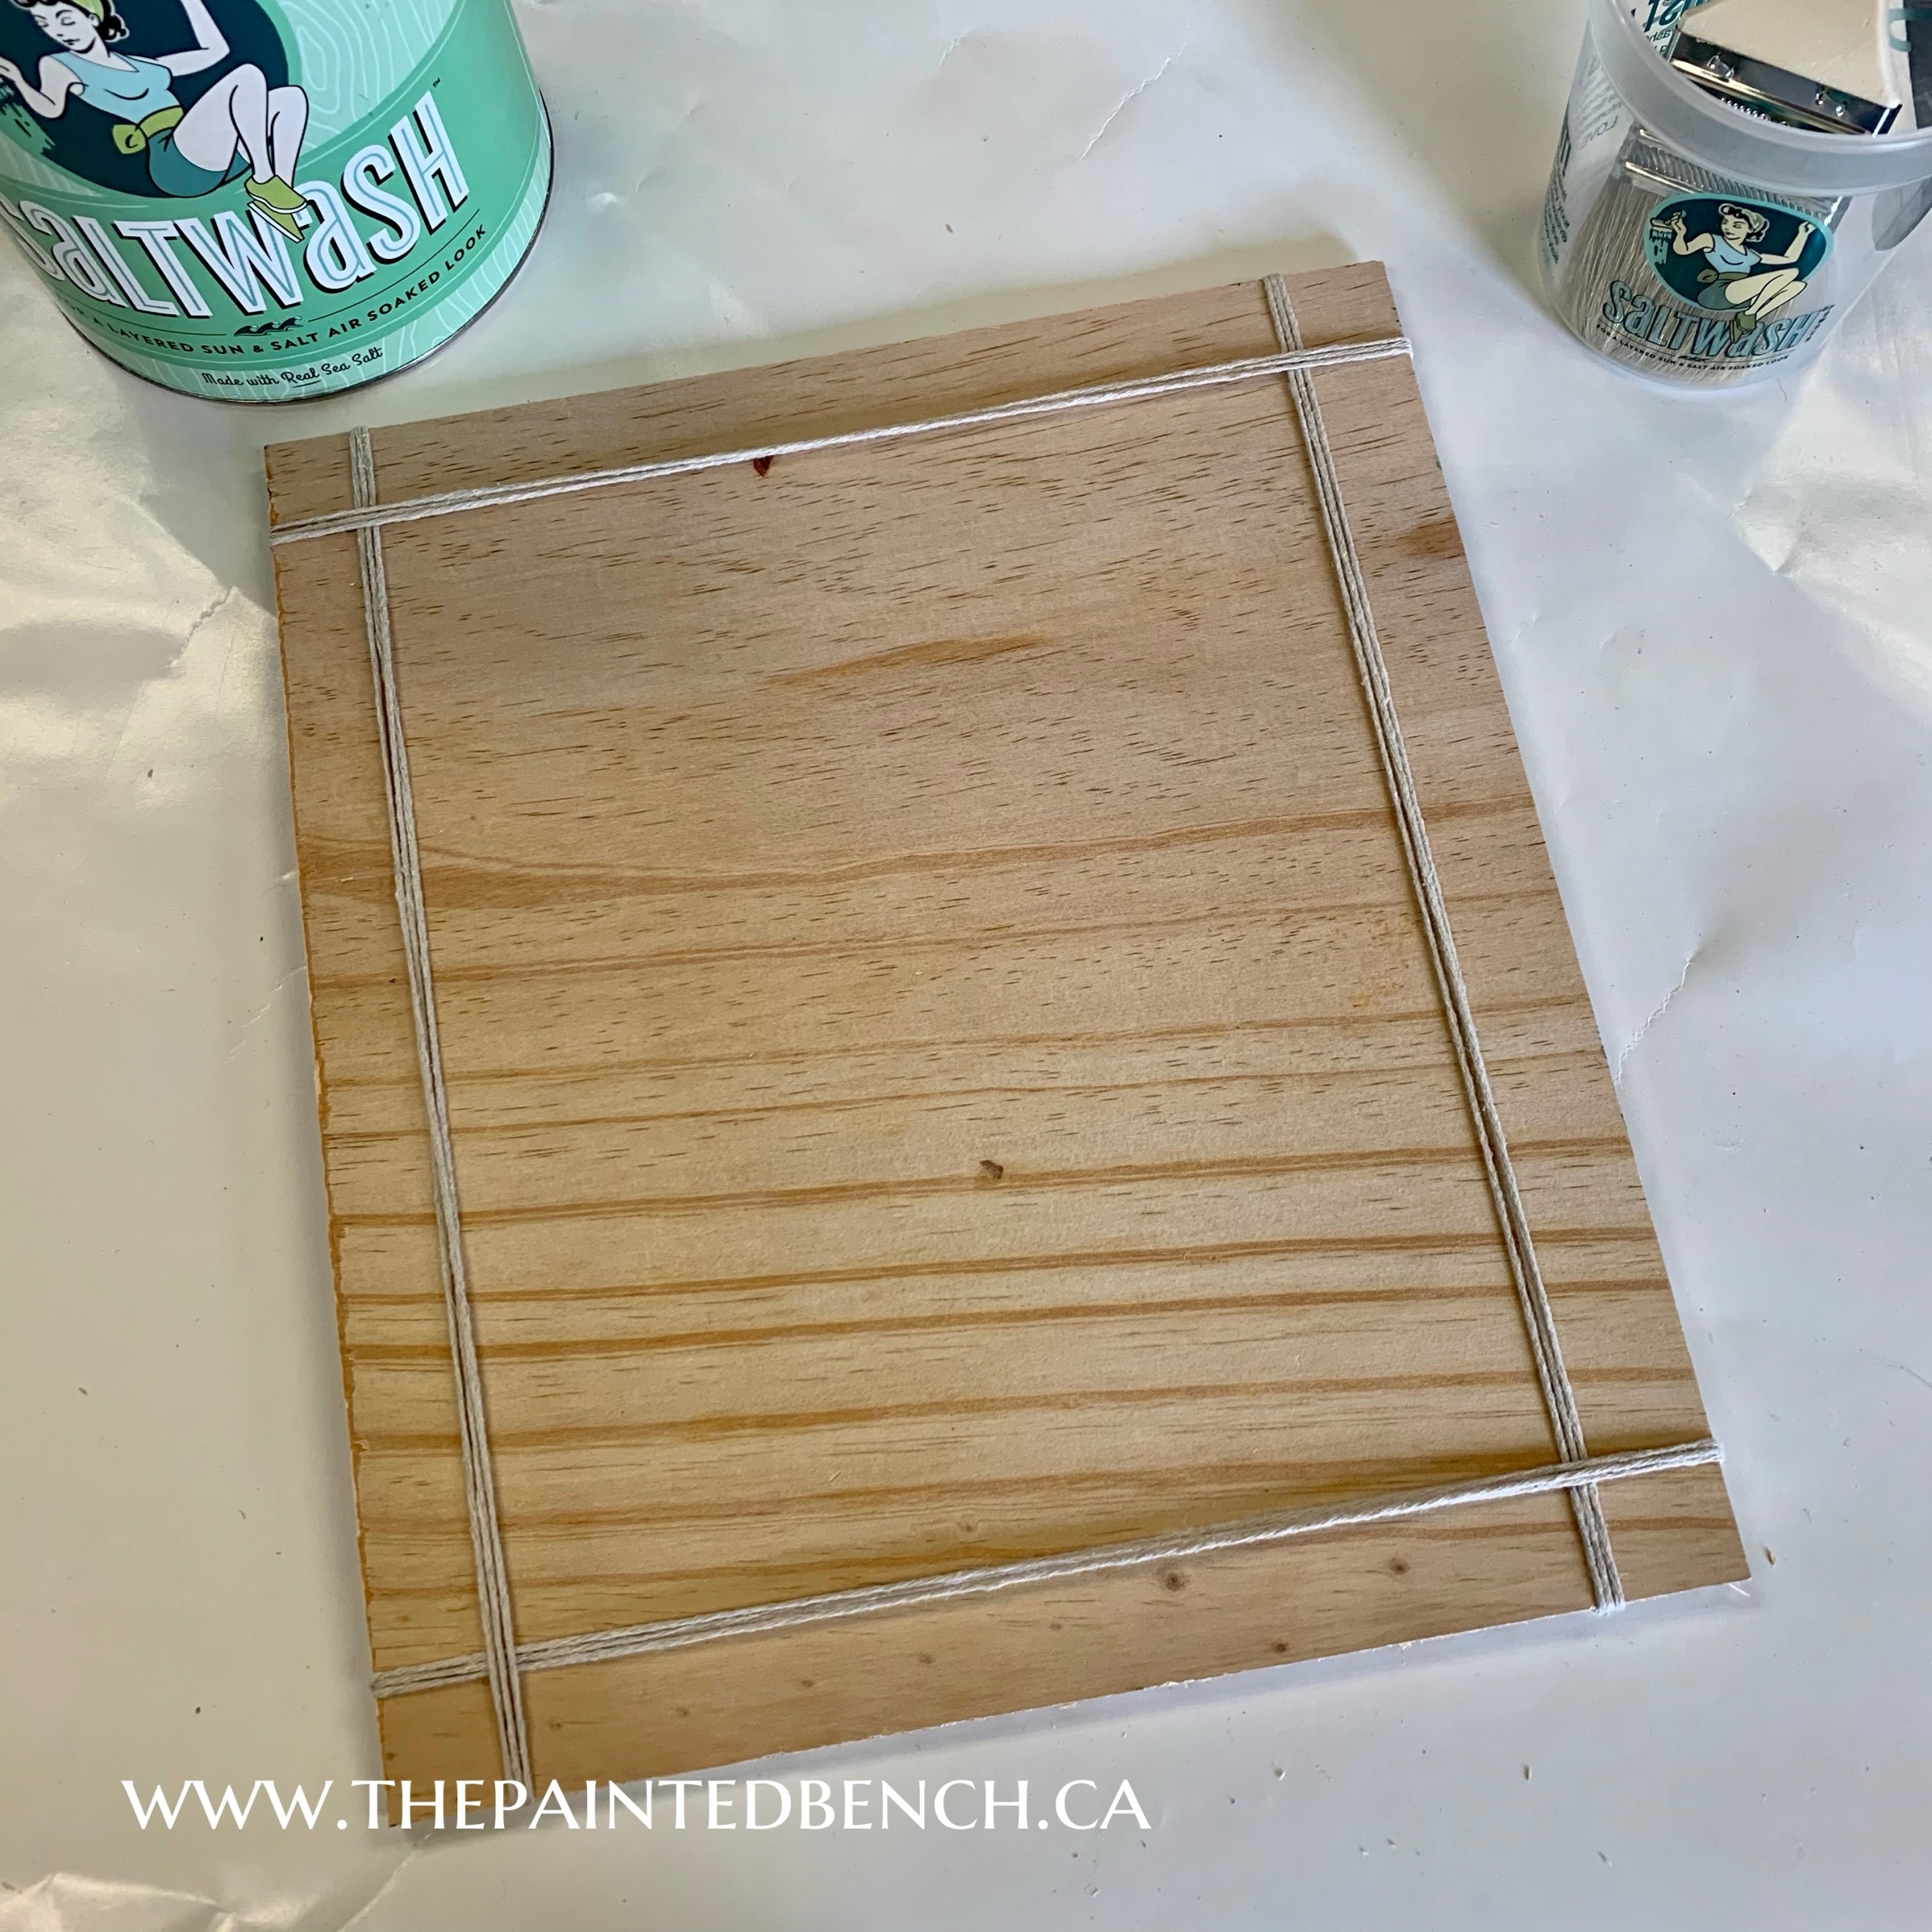
I scrounged around in hubby’s workshop in the basement and found a scrap of 1/8″ plywood.  It was the perfect size and a little warped and really not square, I thought it would be perfect for creating this piece.  If you watched Carmen’s video you will know she uses any number of things from old book covers to old game boards, whatever is handy.

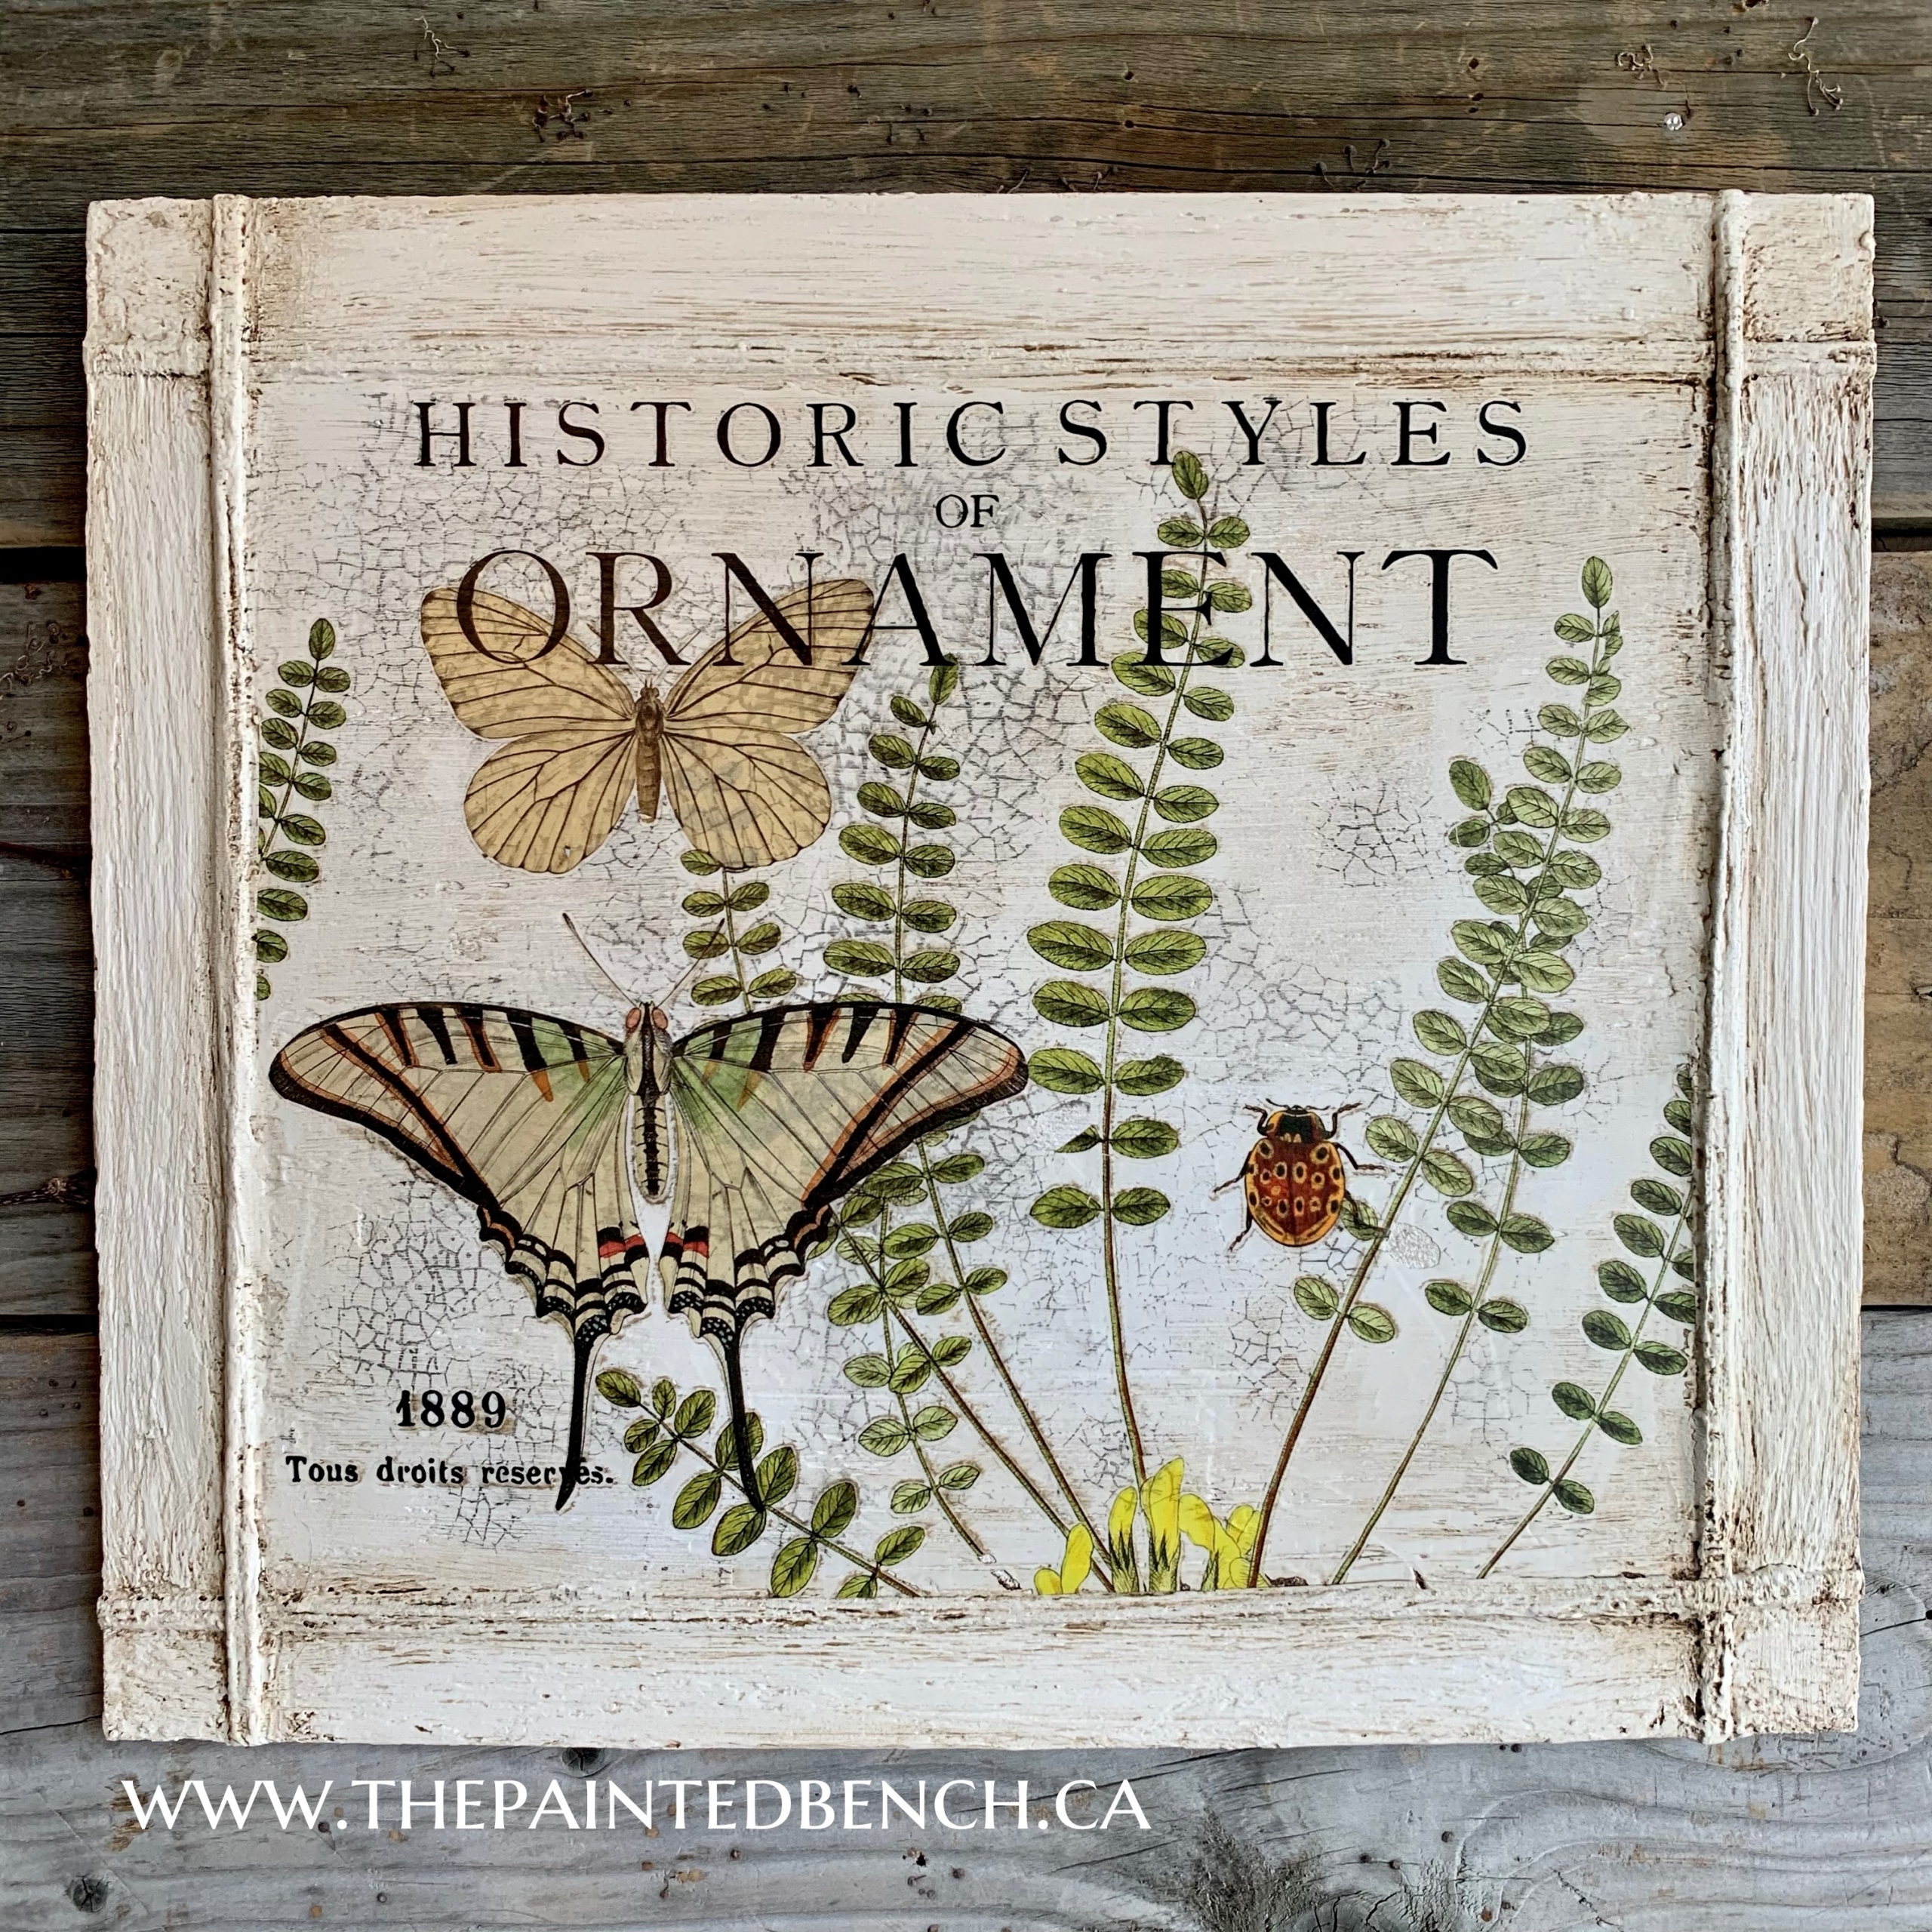
For this project I used leftover bits of IOD Transfers mostly from Entomology and Fronds and the text came from Label Ephemera, any bits of leftover transfers will work for this.

I wrapped my board with some butchers’s twine that I had in the shop but any string or twine will work.  Make sure this is as tight as you can get it, it stays in place much better that way.  I eyeballed the placement, I really didn’t want perfection.

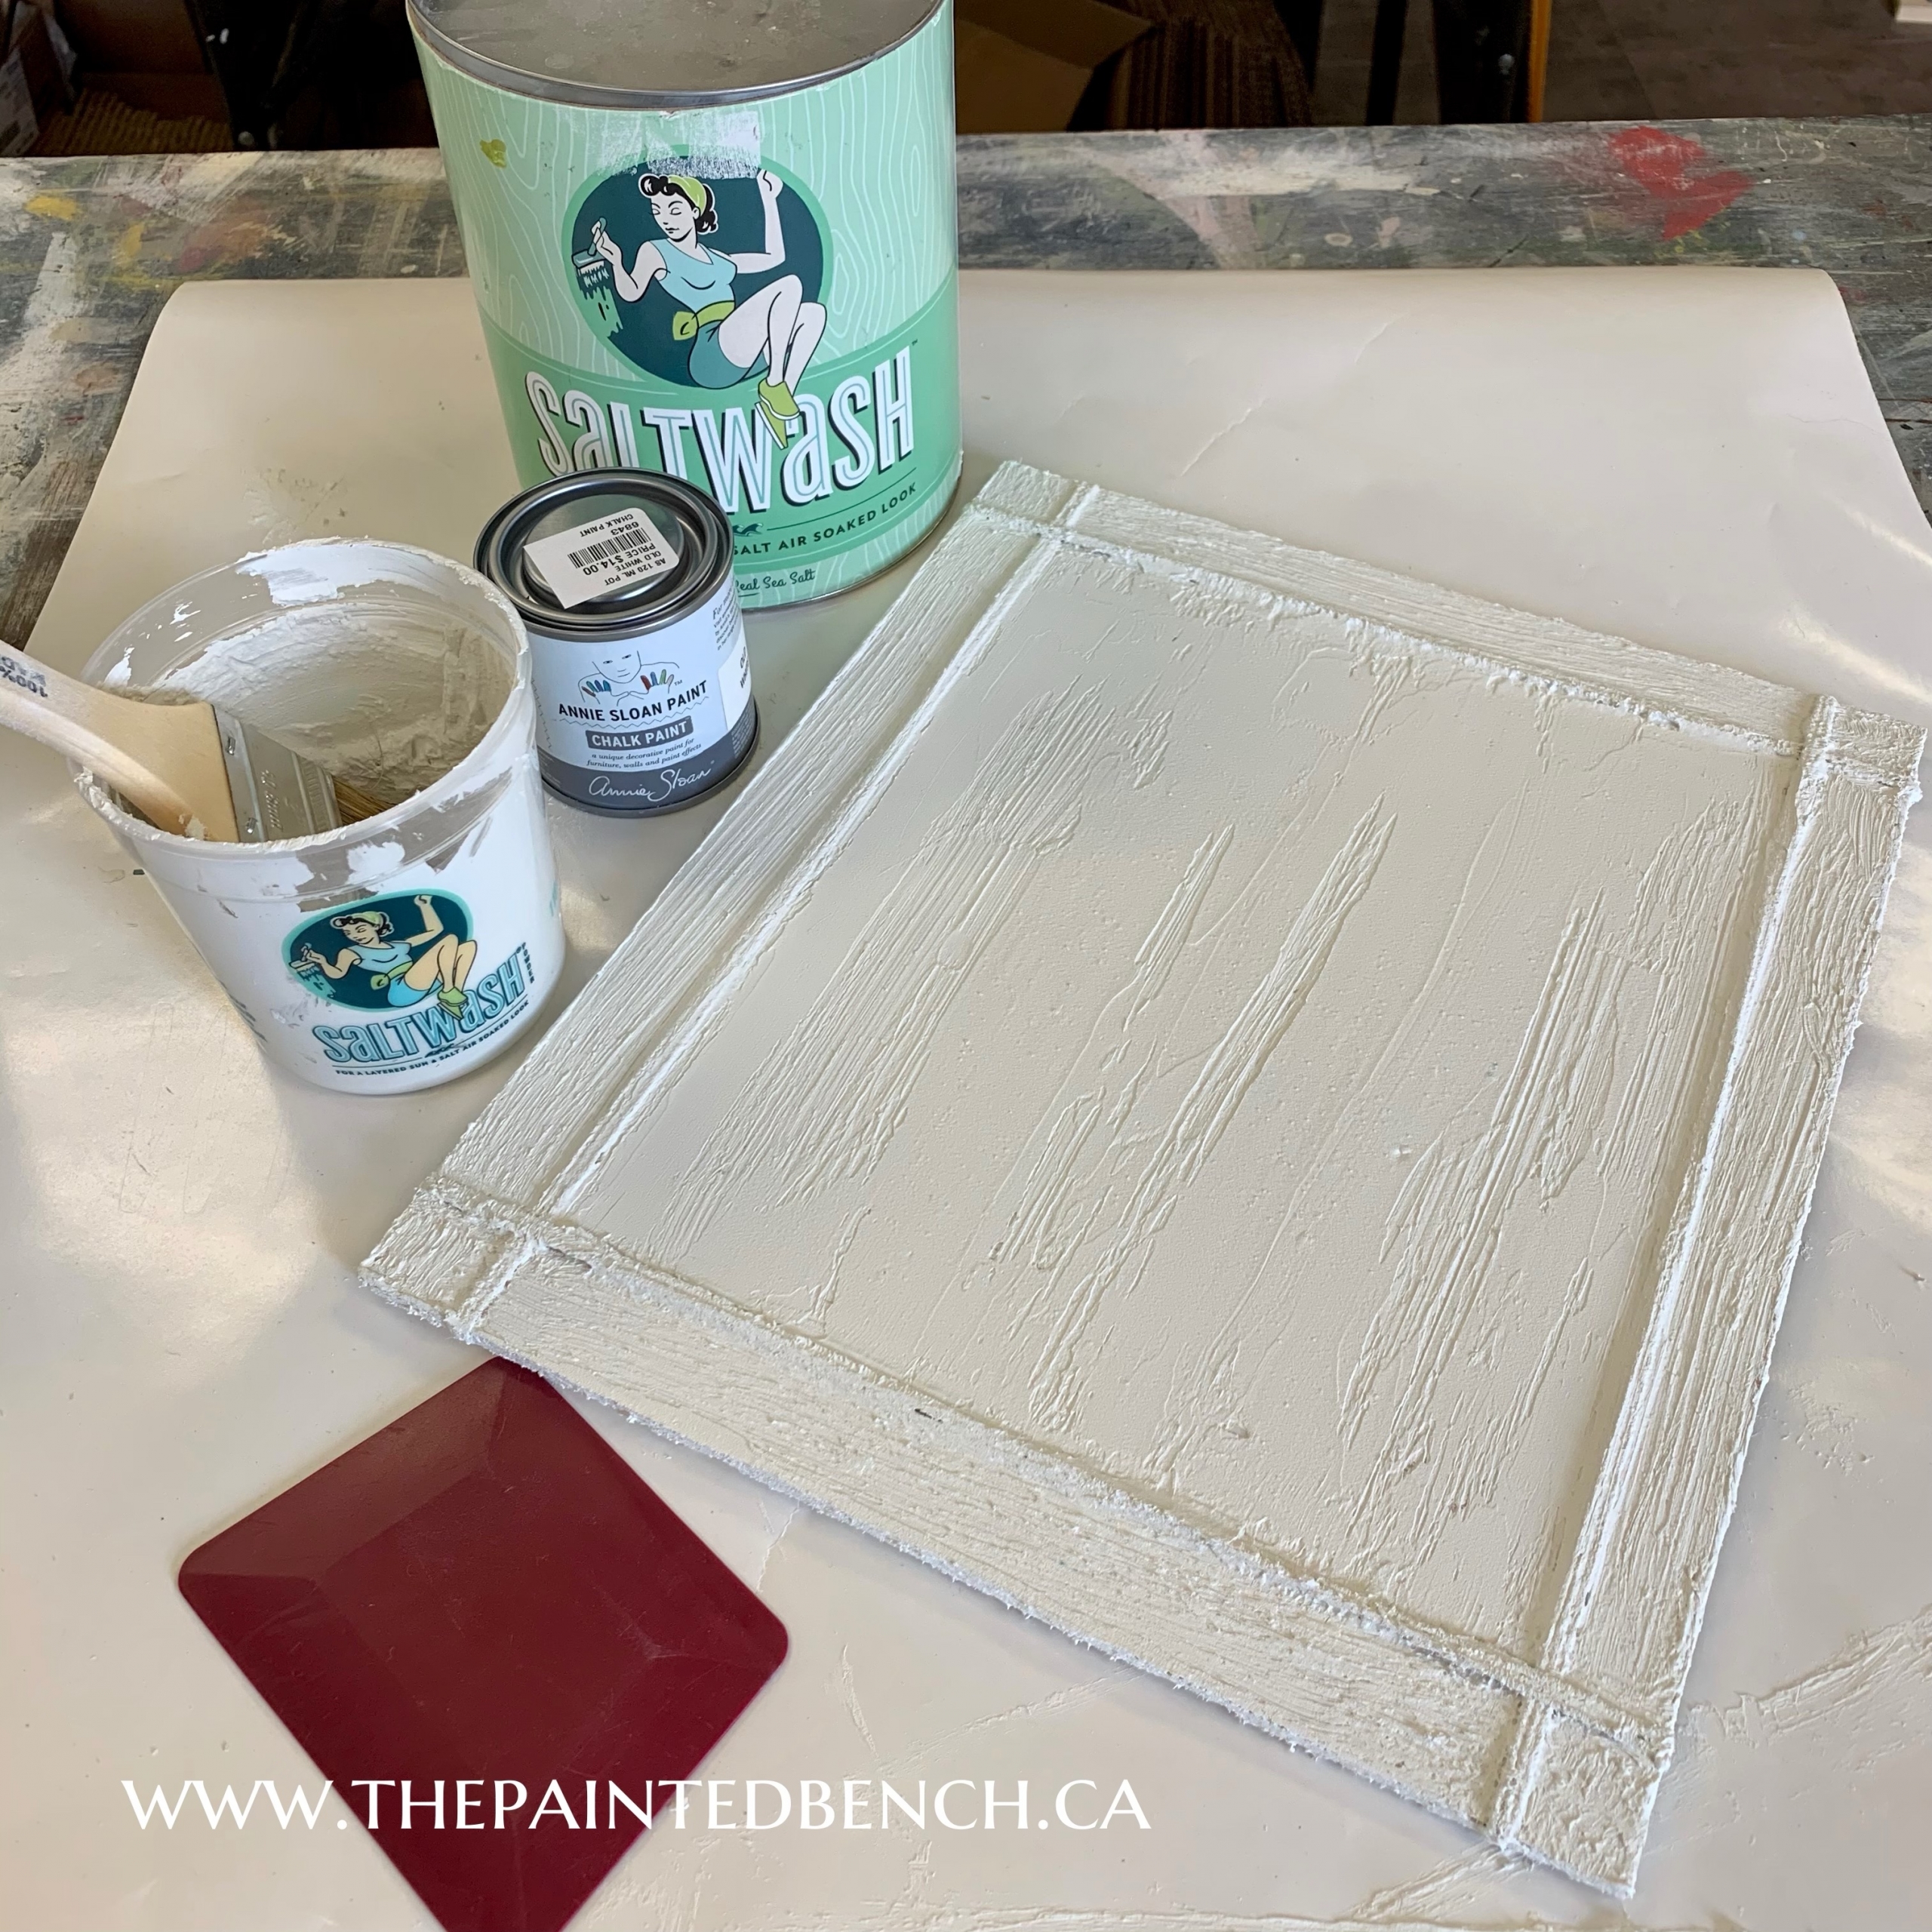
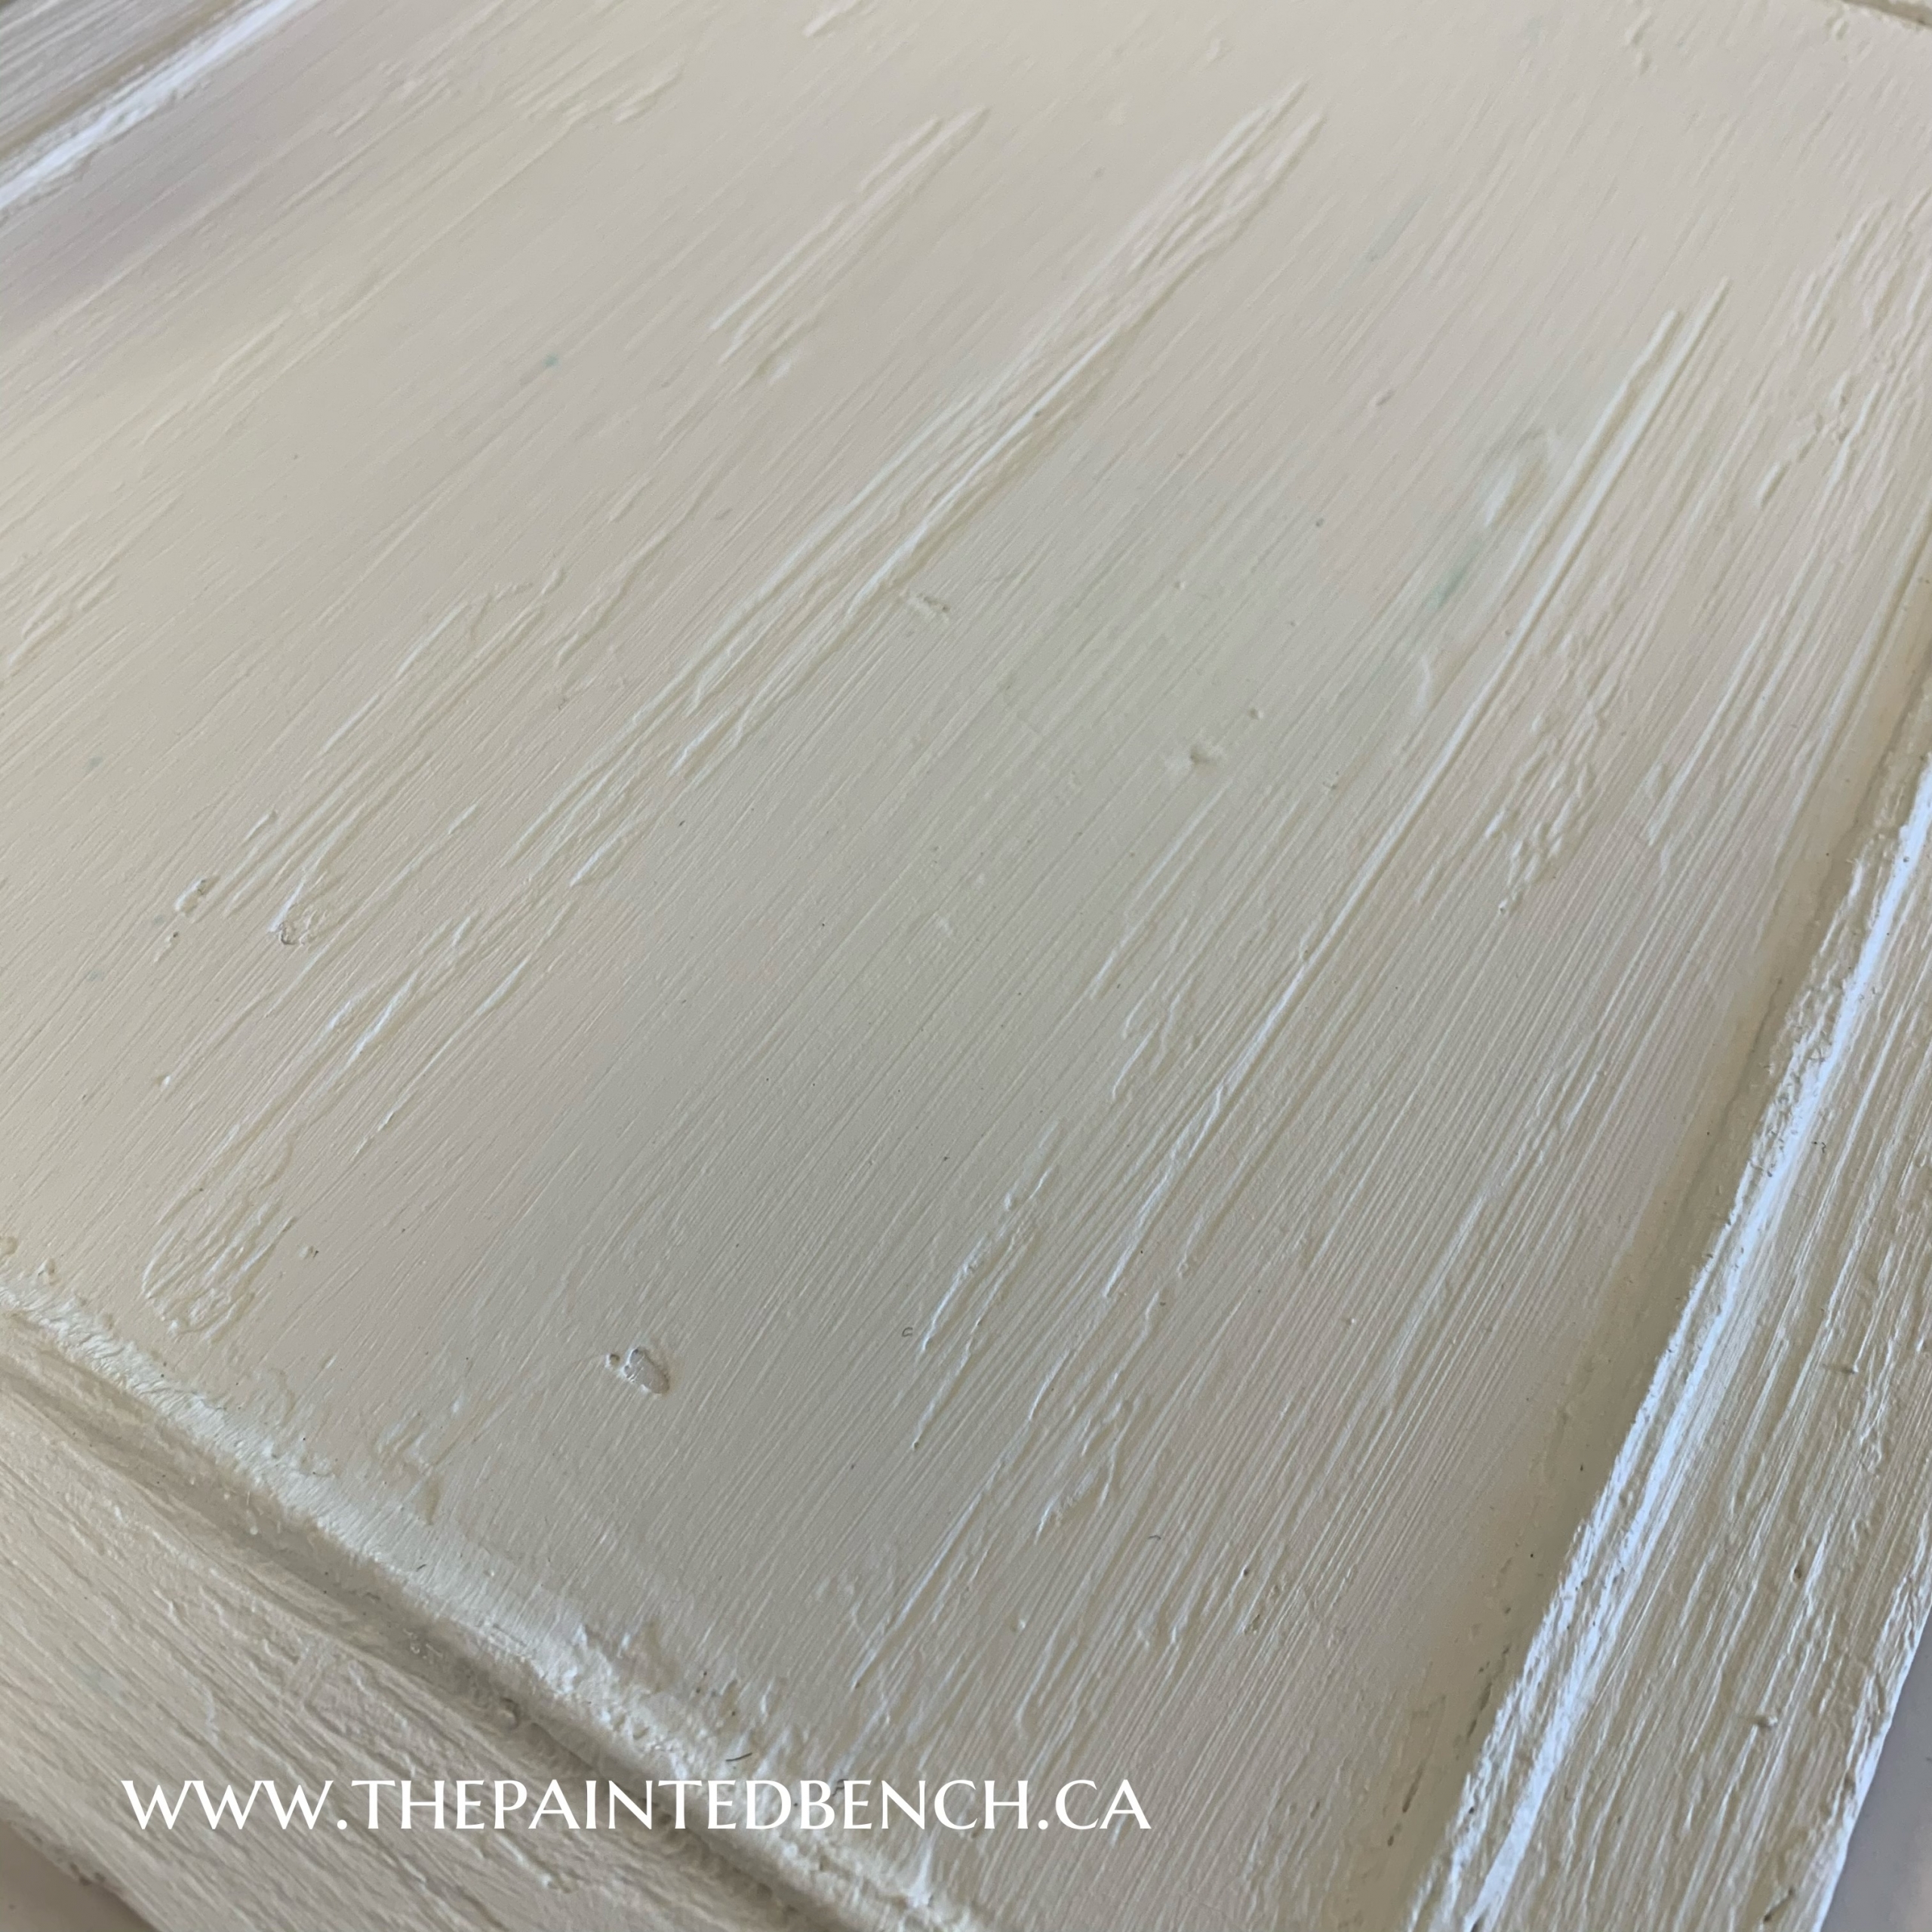
The instructions on the video said to use plaster of paris for this step, since I didn’t have any and we use Saltwash for texture all of the time, I gave it a try and it worked perfectly!  I made a 50/50 mix of Annie Sloan Paint and powder and brushed it on instead of pouncing creating a smoother finish than we normally would with a Saltwash mixture. I then took my squeegee for my stencil work and smoothed the mixture down even more creating a nice surface for the transfers.  You could use an old giftcard for this step or a paint scraper.  Just be sure you don’t smooth too much and expose the board underneath, you want a nice coating on here.  Just look at that texture!

Set this aside to dry thoroughly.  I set mine in front of a fan for 20 minutes or so which probably wasn’t long enough, I’m not known for my patience!  When dry it should feel room temperature, if it is still cool to the touch it isn’t dry.

Because I mixed Old White by Annie Sloan with the Saltwash I could have skipped the coat of paint that Carmen applied to the plaster of paris. As long as I had good coverage without anything showing from underneath I would be fine.  I went ahead and applied a coat of Old White but I didn’t really need it.  Once that was completely dry I sealed the painted surface.

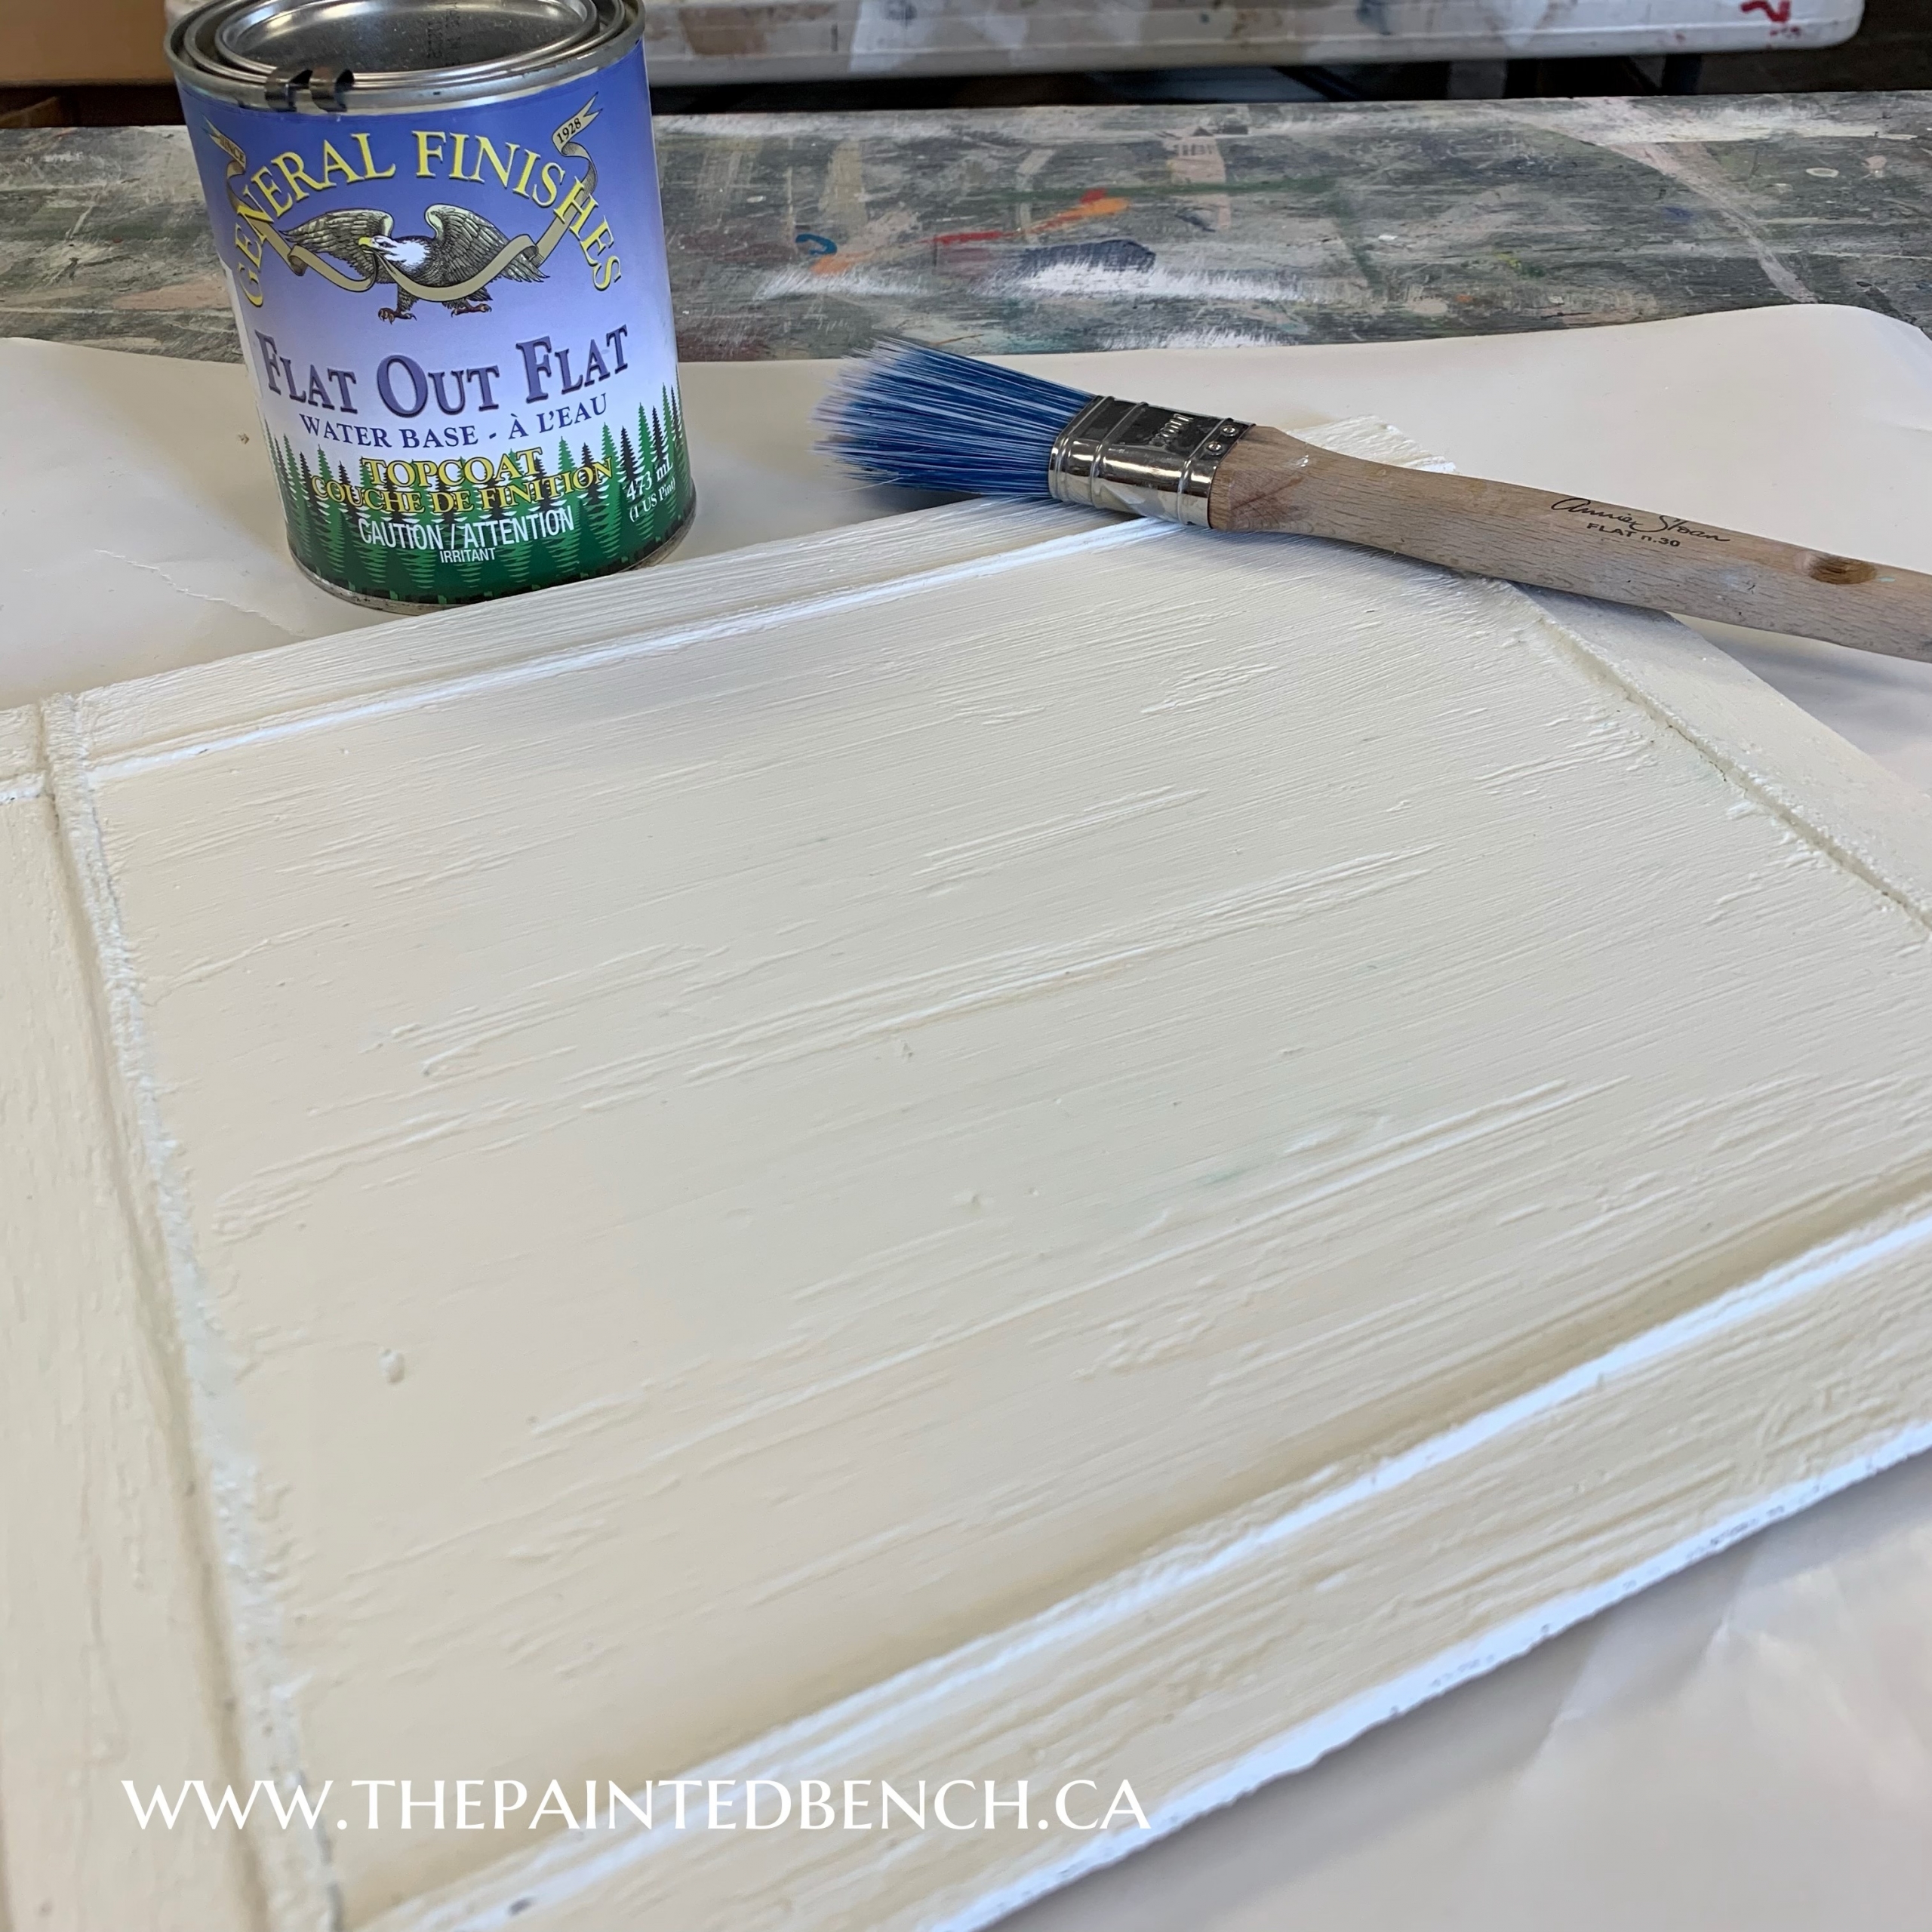
To seal the painted surface for transfers I always use Flat Out Flat from General Finishes.  It provides a completely matte finish and the IOD transfers stick to it like glue!  It is recommended that you seal your painted surface if you are using a chalk or clay based paint before you apply your transfer.


Now the fun begins!  I sorted through the transfer scraps that I had on hand and chose some pieces that I liked for this piece.  I arranged them in various ways changed out some bits and finally settled on something.  Make sure you leave the backing on your transfers while you are working on placement.  I’m tempted to try it without and I always end up with something sticking together, not good!

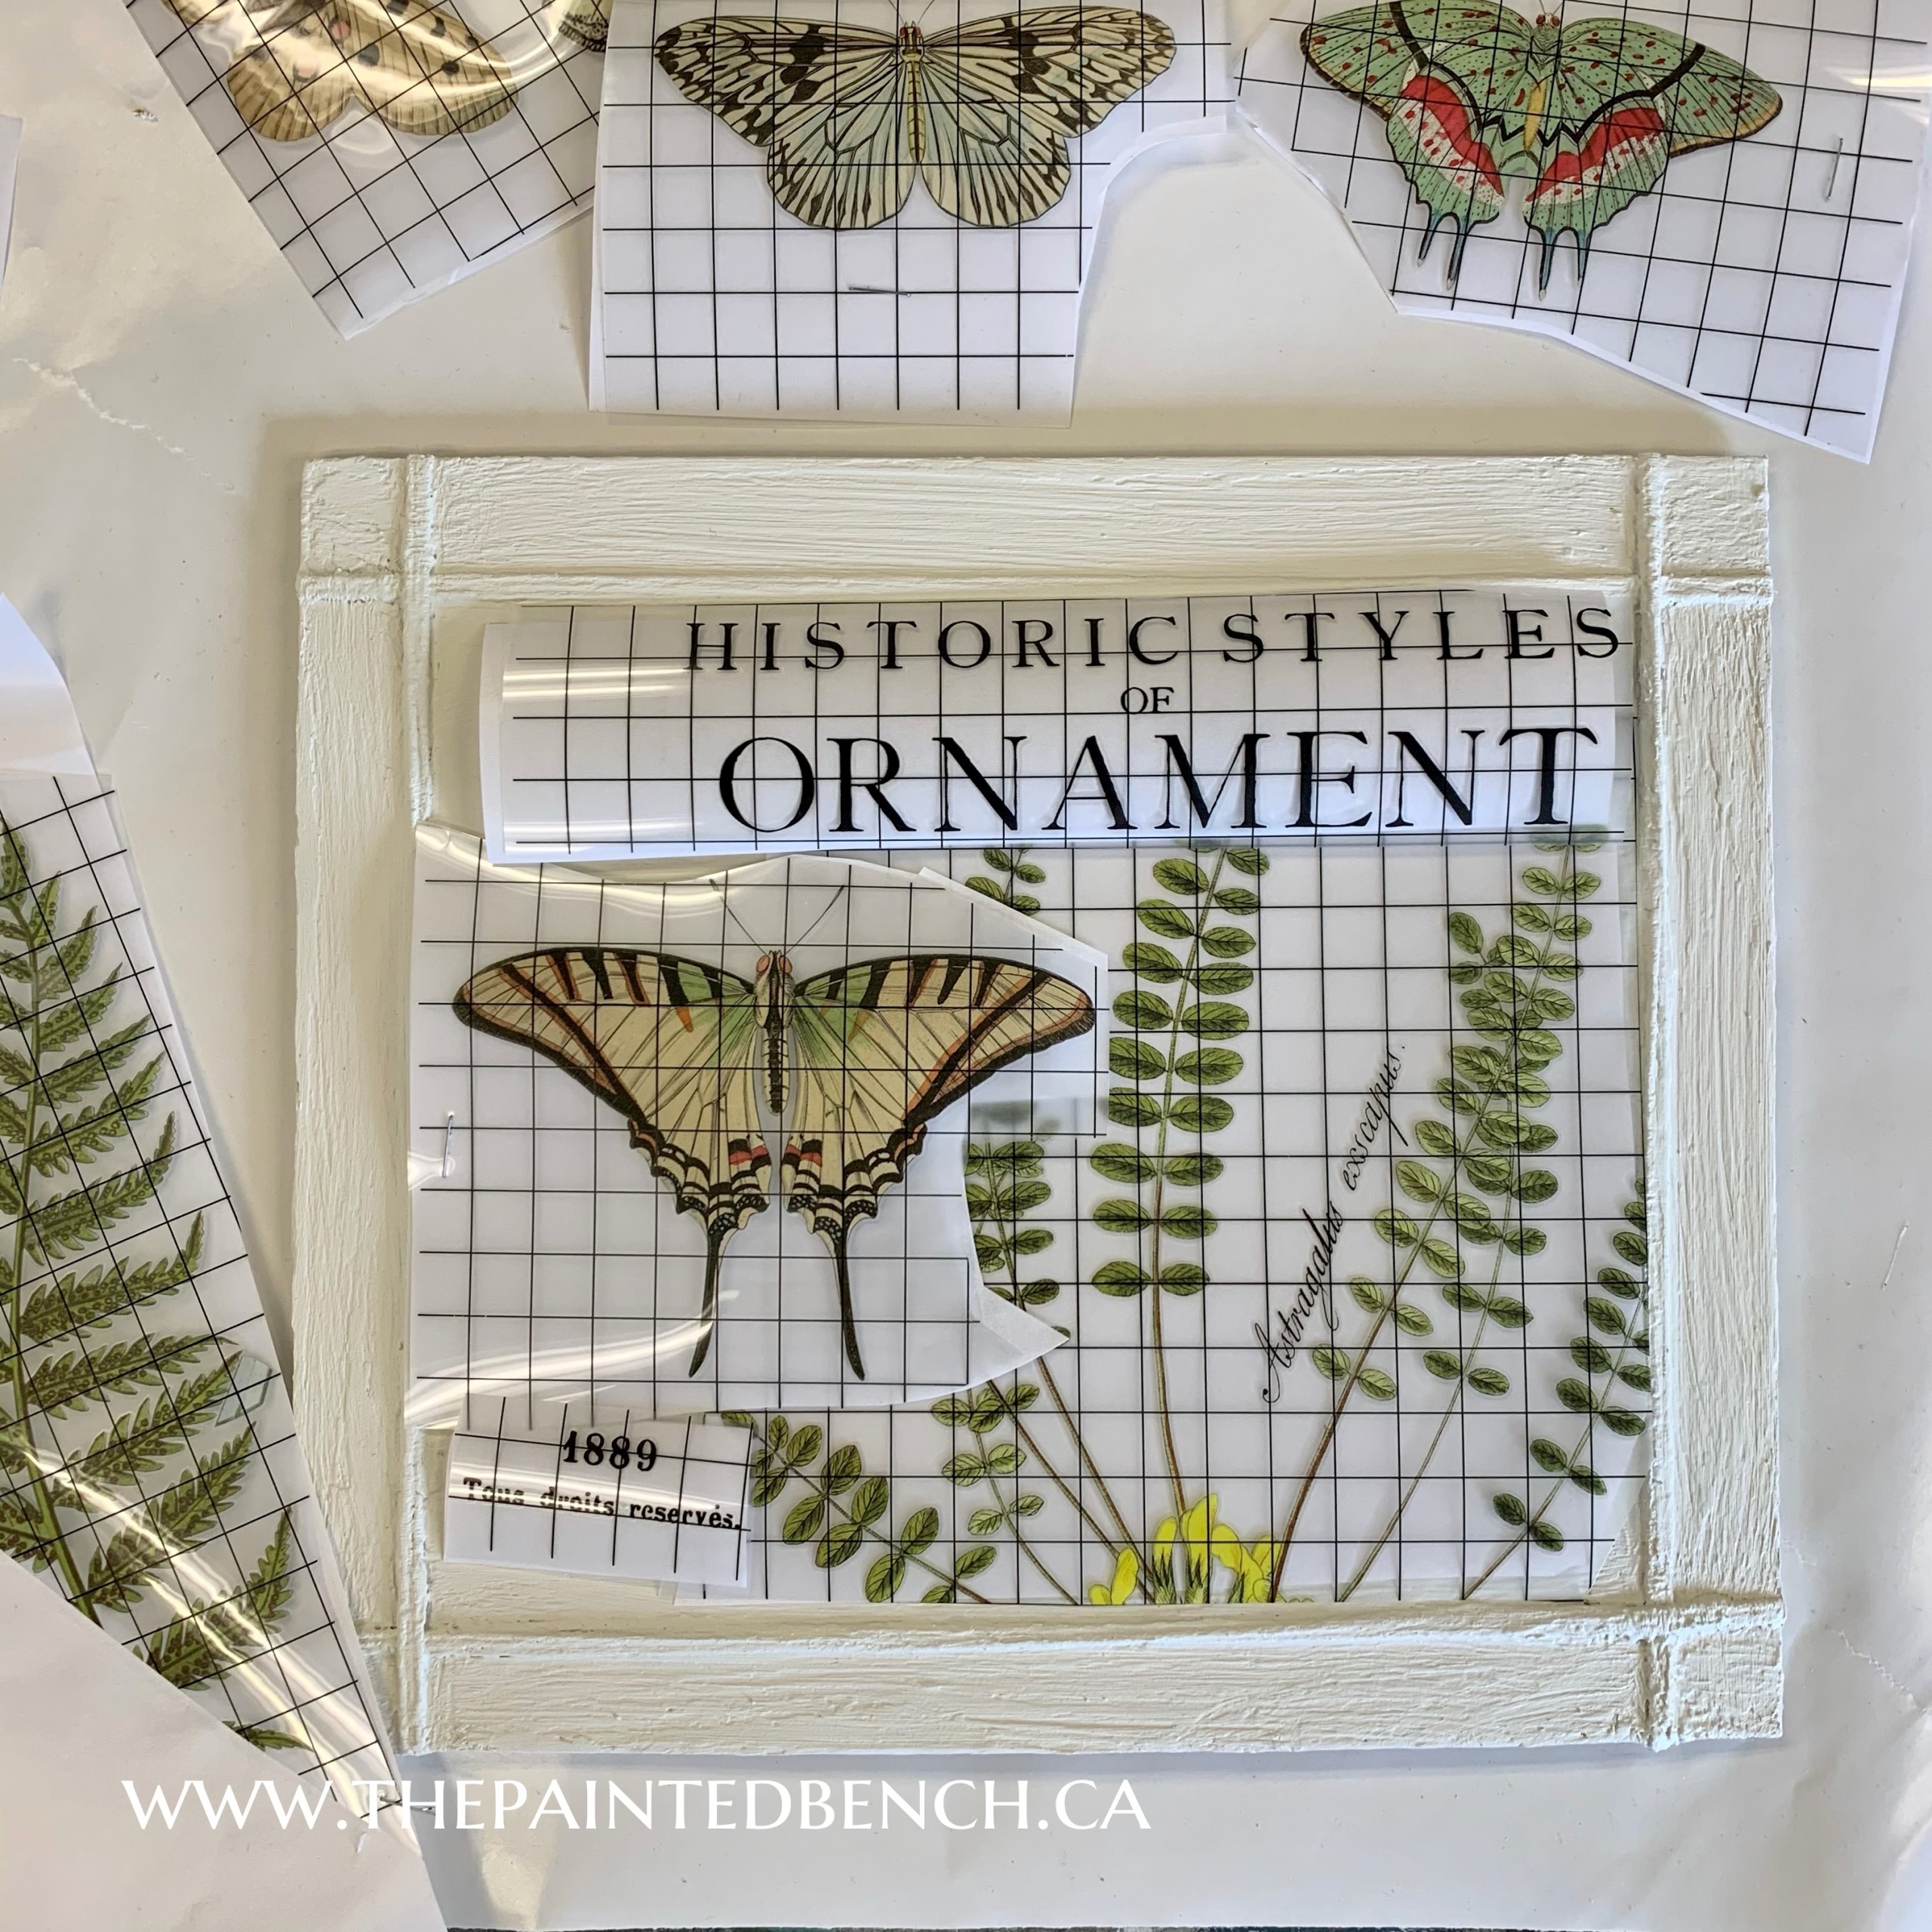
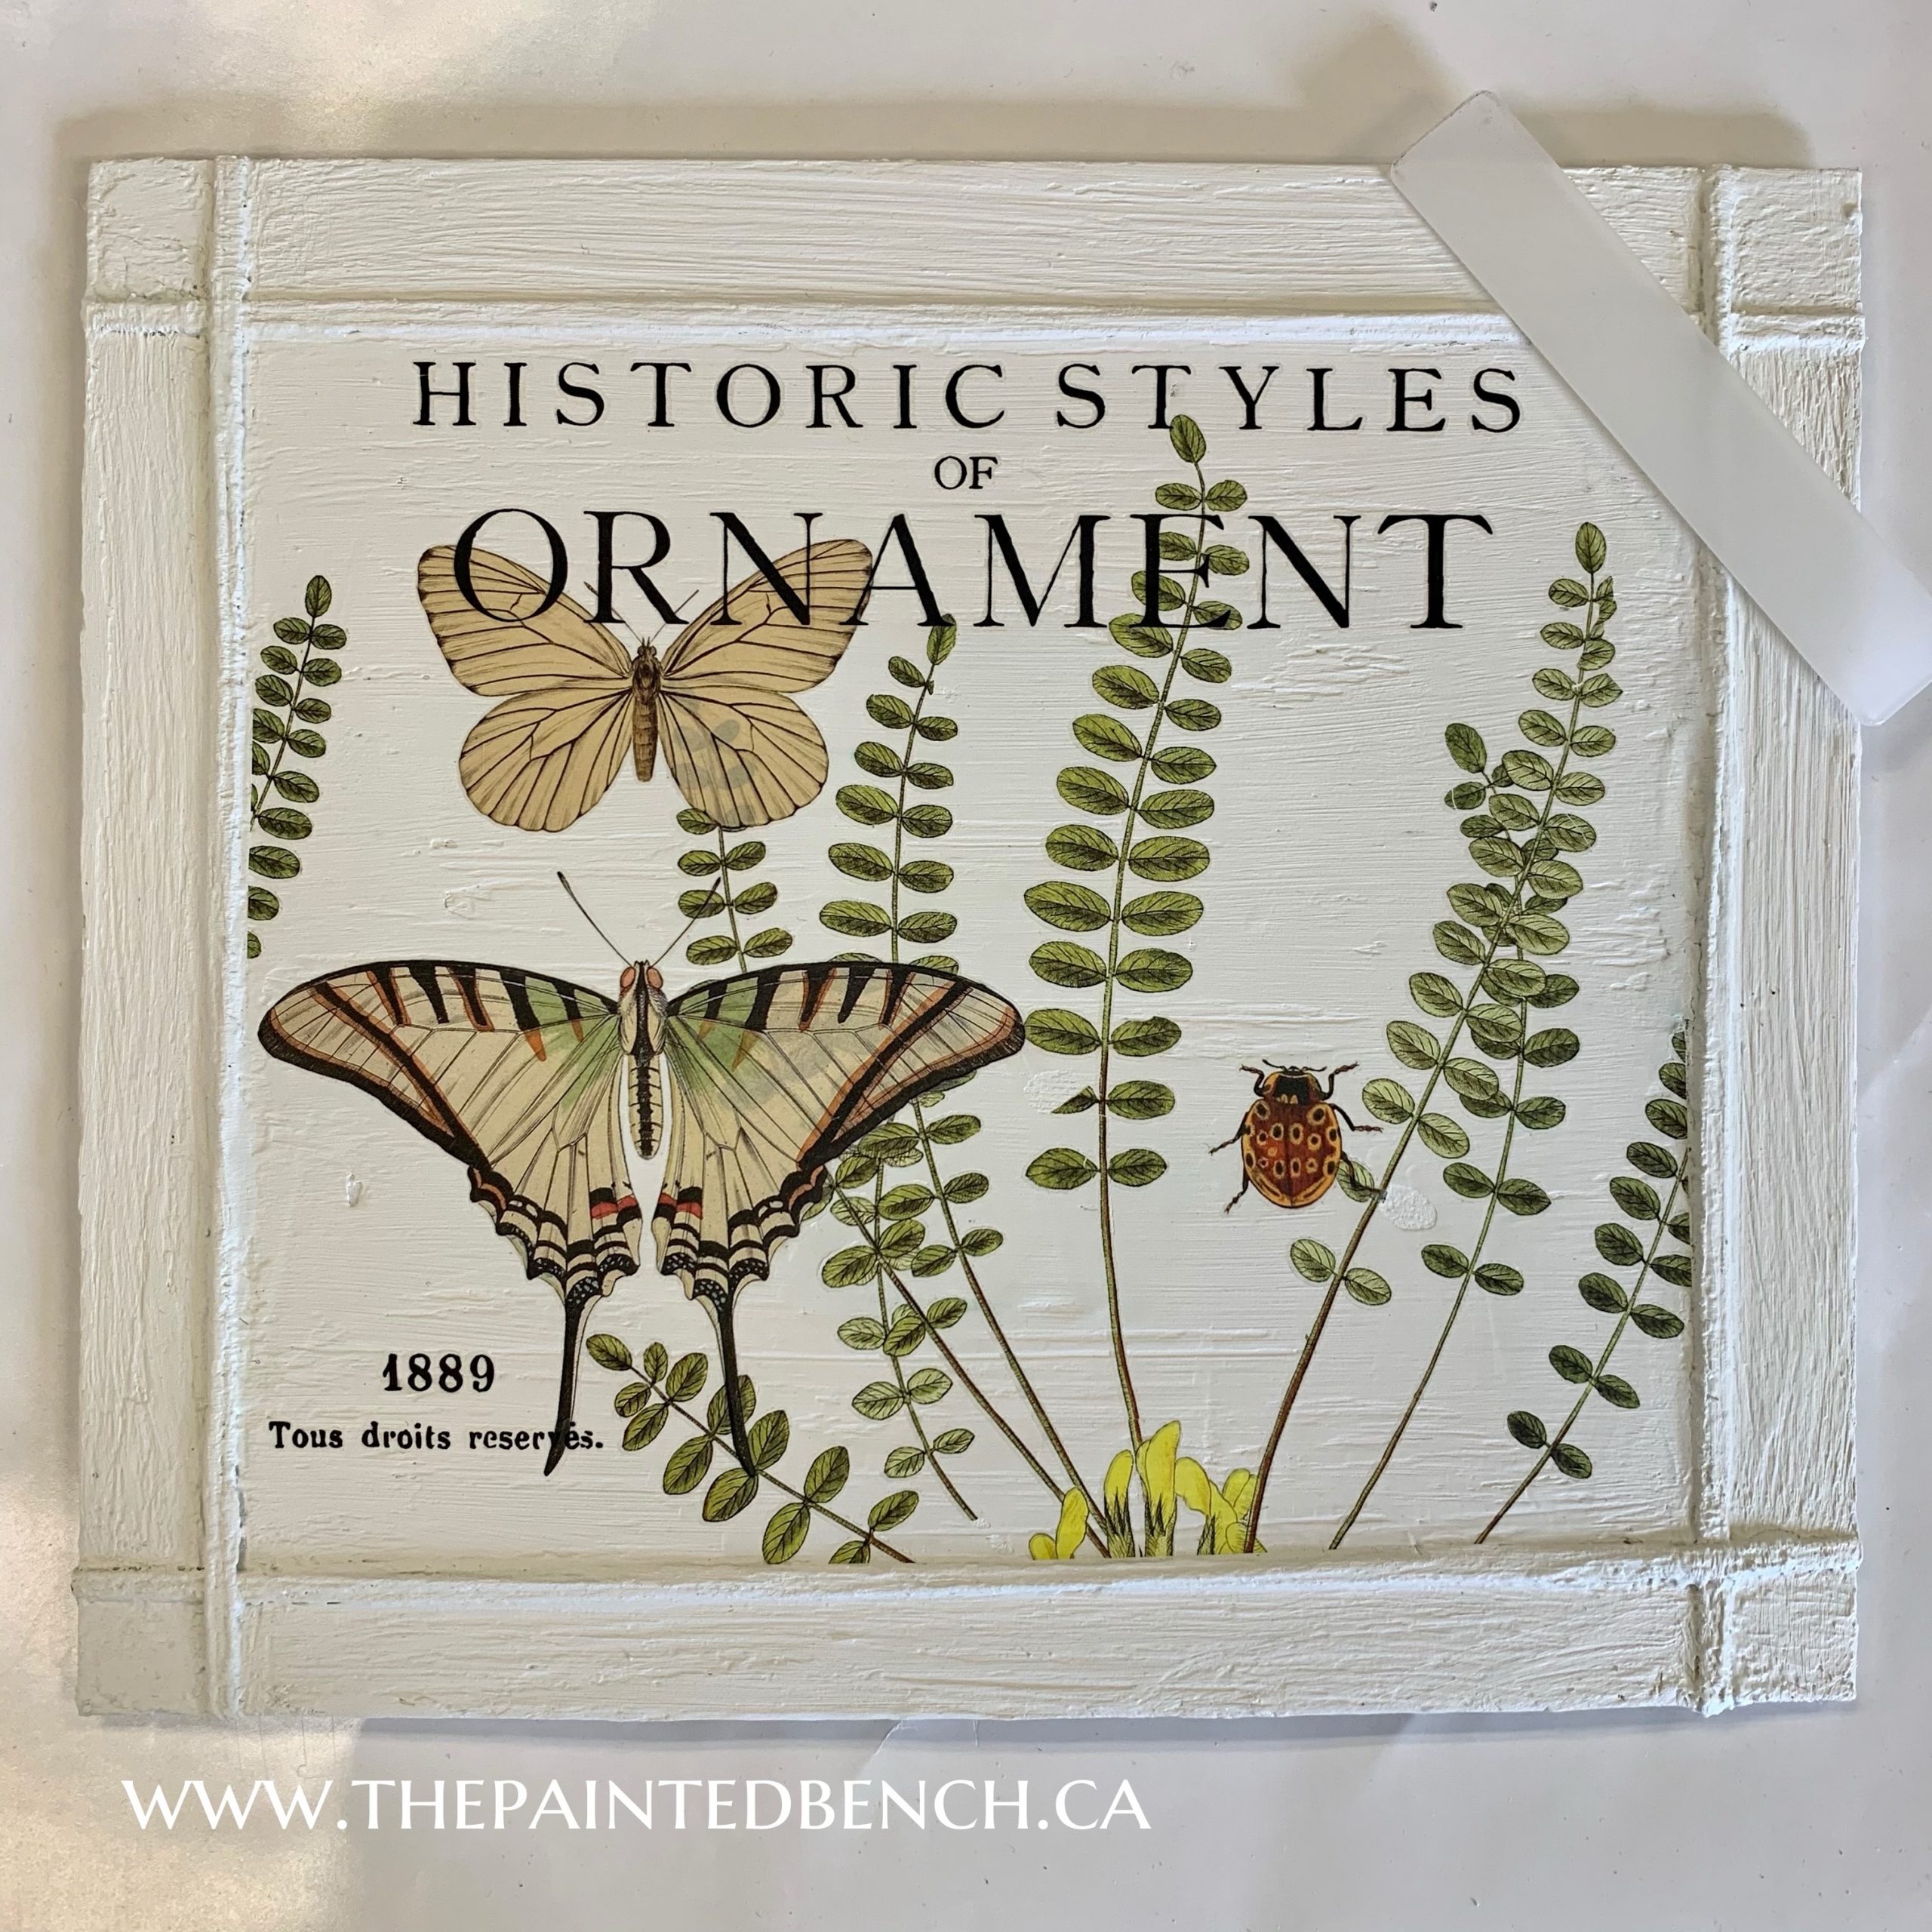
Don’t think your design is written in stone at this point.  As you can see from my final layout I changed the arrangement and added another butterfly and I like it so much better!  I won’t go into applying transfers at this time,  if you haven’t used transfers before we can guide you through that step but for most of you you know what you’re doing.

Remember I said I should have let this dry a little more before I started to apply the transfers?  If you look closely you can see where a leaf to the right of the beetle lifted off with a layer of topcoat.  Make sure you take the time to let each layer dry completely to avoid this problem.  On here it doesn’t bother me at all, however if was working on a bigger project and more of my transfer did this I would not be happy.  I usually wait 24 hours between paint and transfer just to make sure everything is dry.

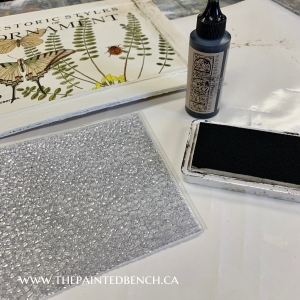
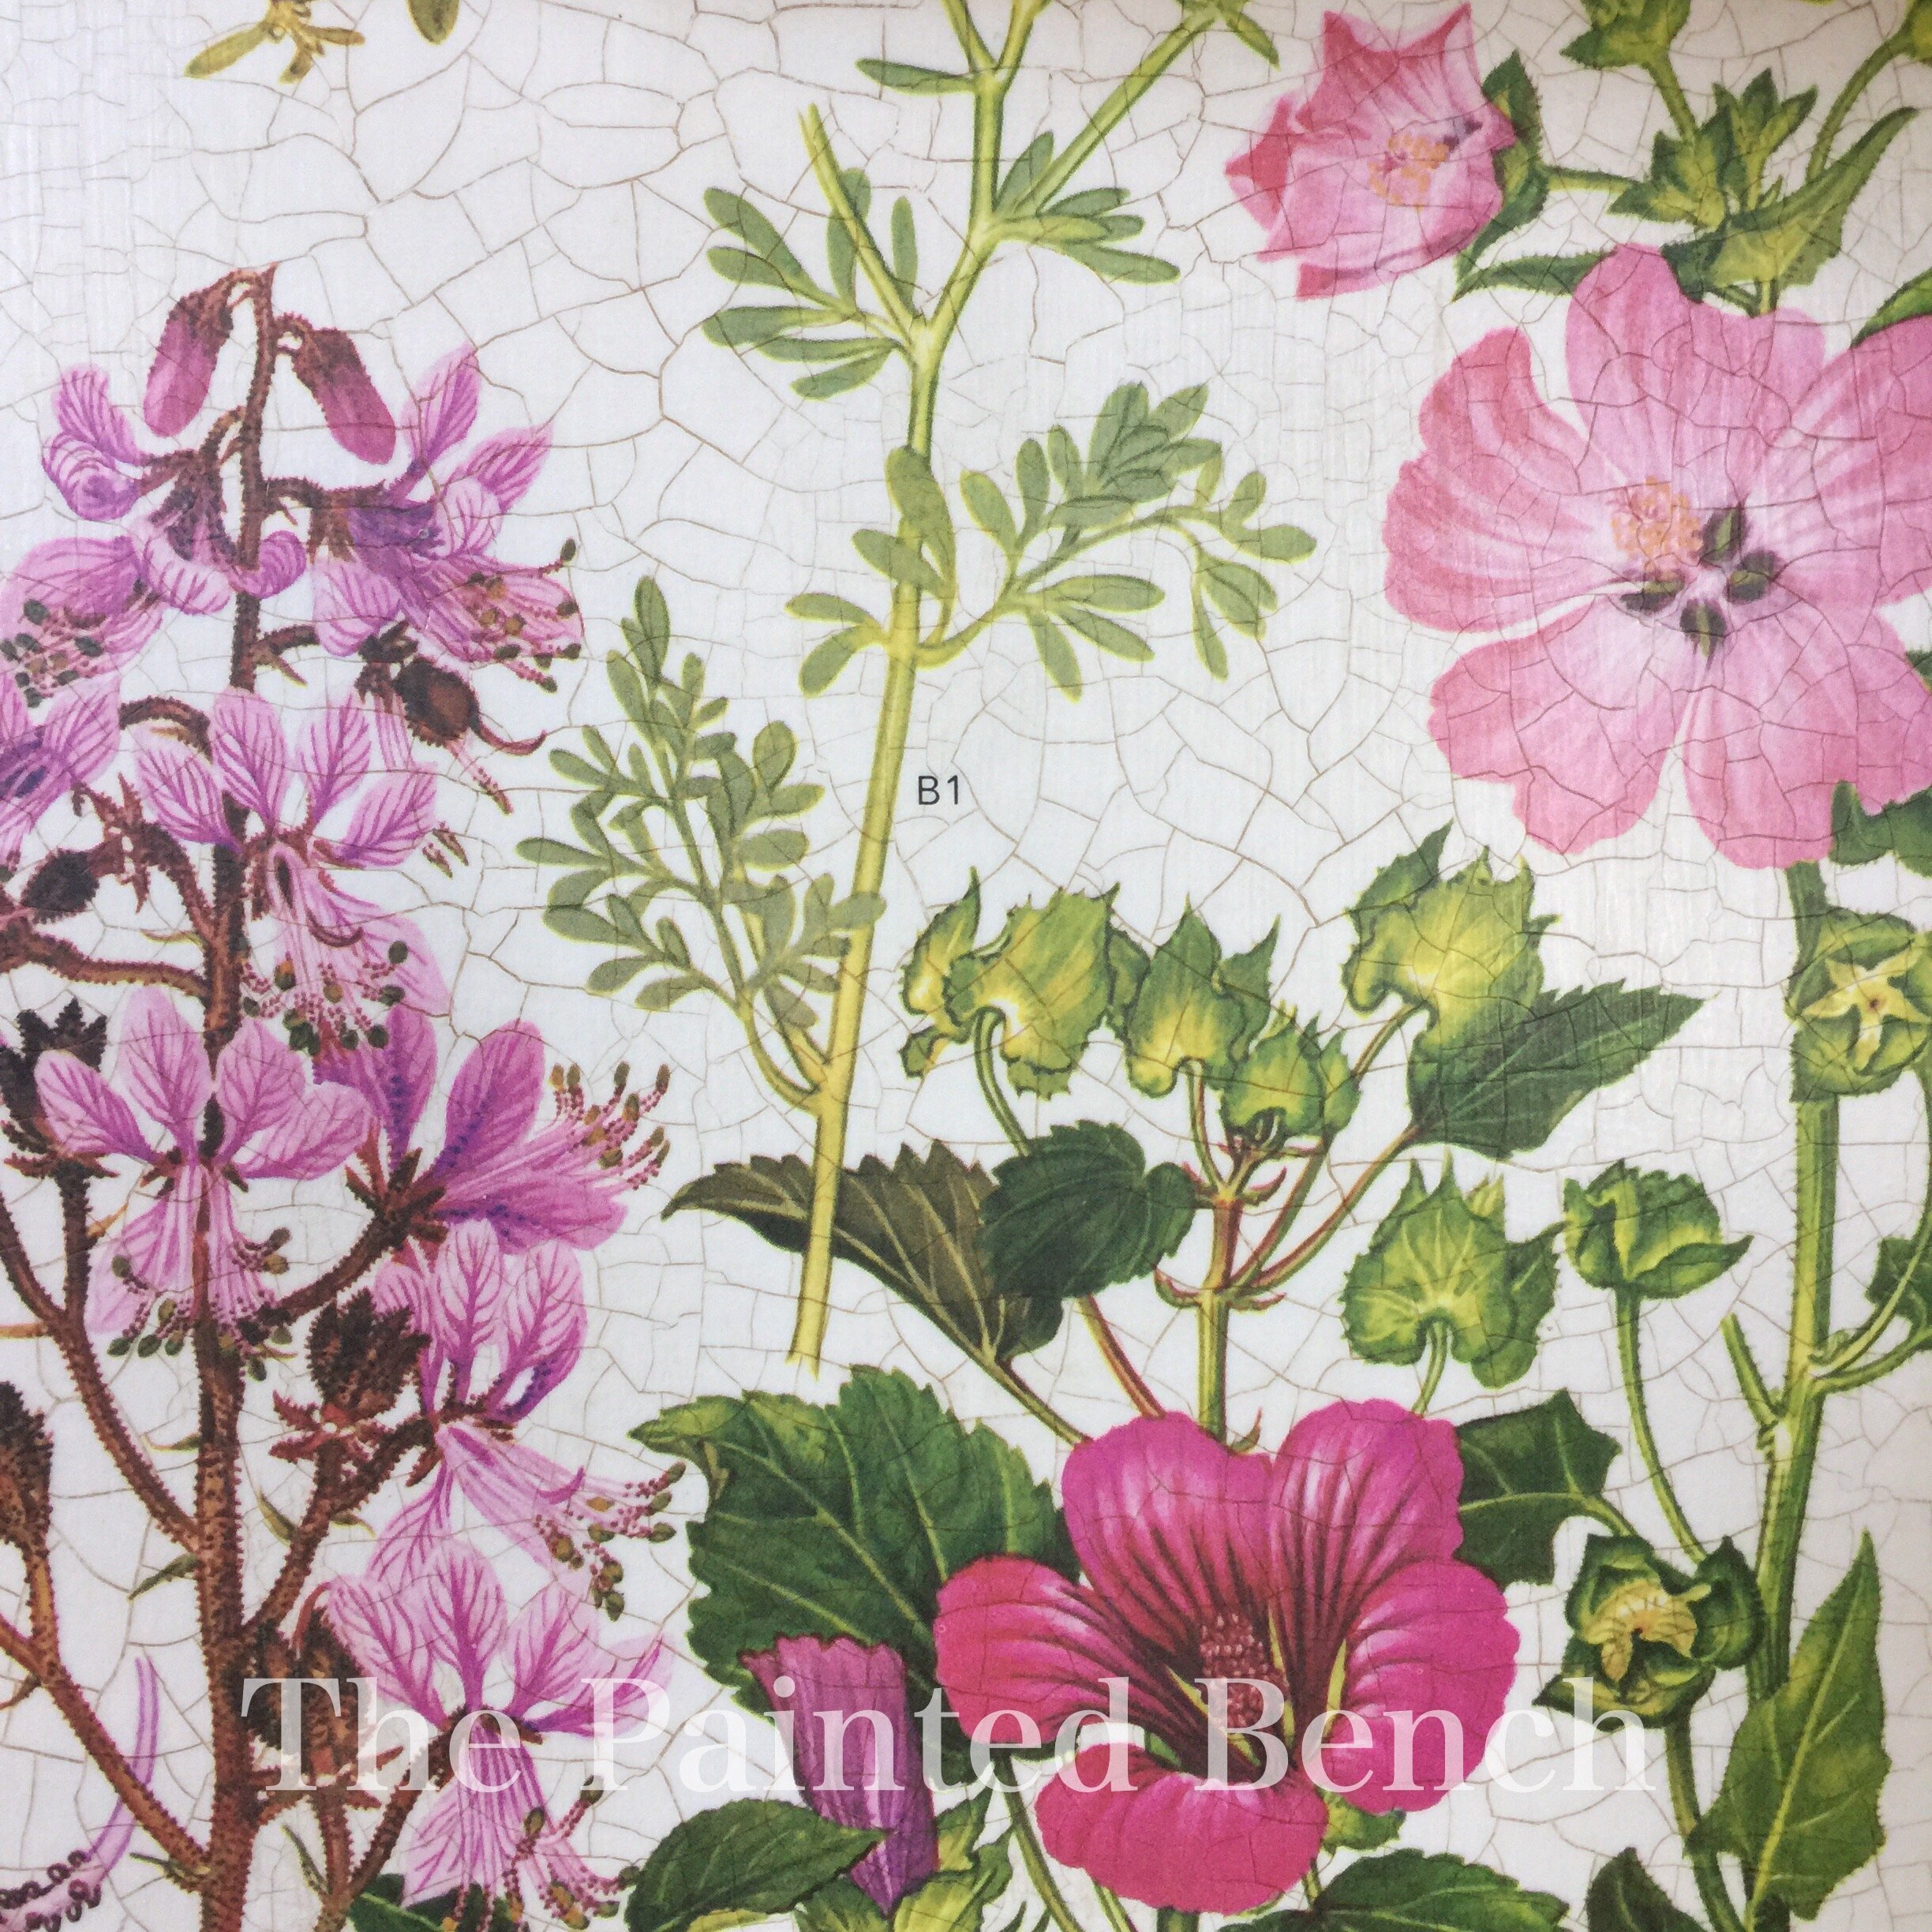
To finish everything up I added a little aging with my IOD Craqueleur Stamp and some IOD Black Ink.  Next time I will use Stone Grey Ink instead, I think the black stands out a little too much.  You might have noticed that I have cut my stamp into quarters to make it easier to use, it comes in a 12×12 sheet.

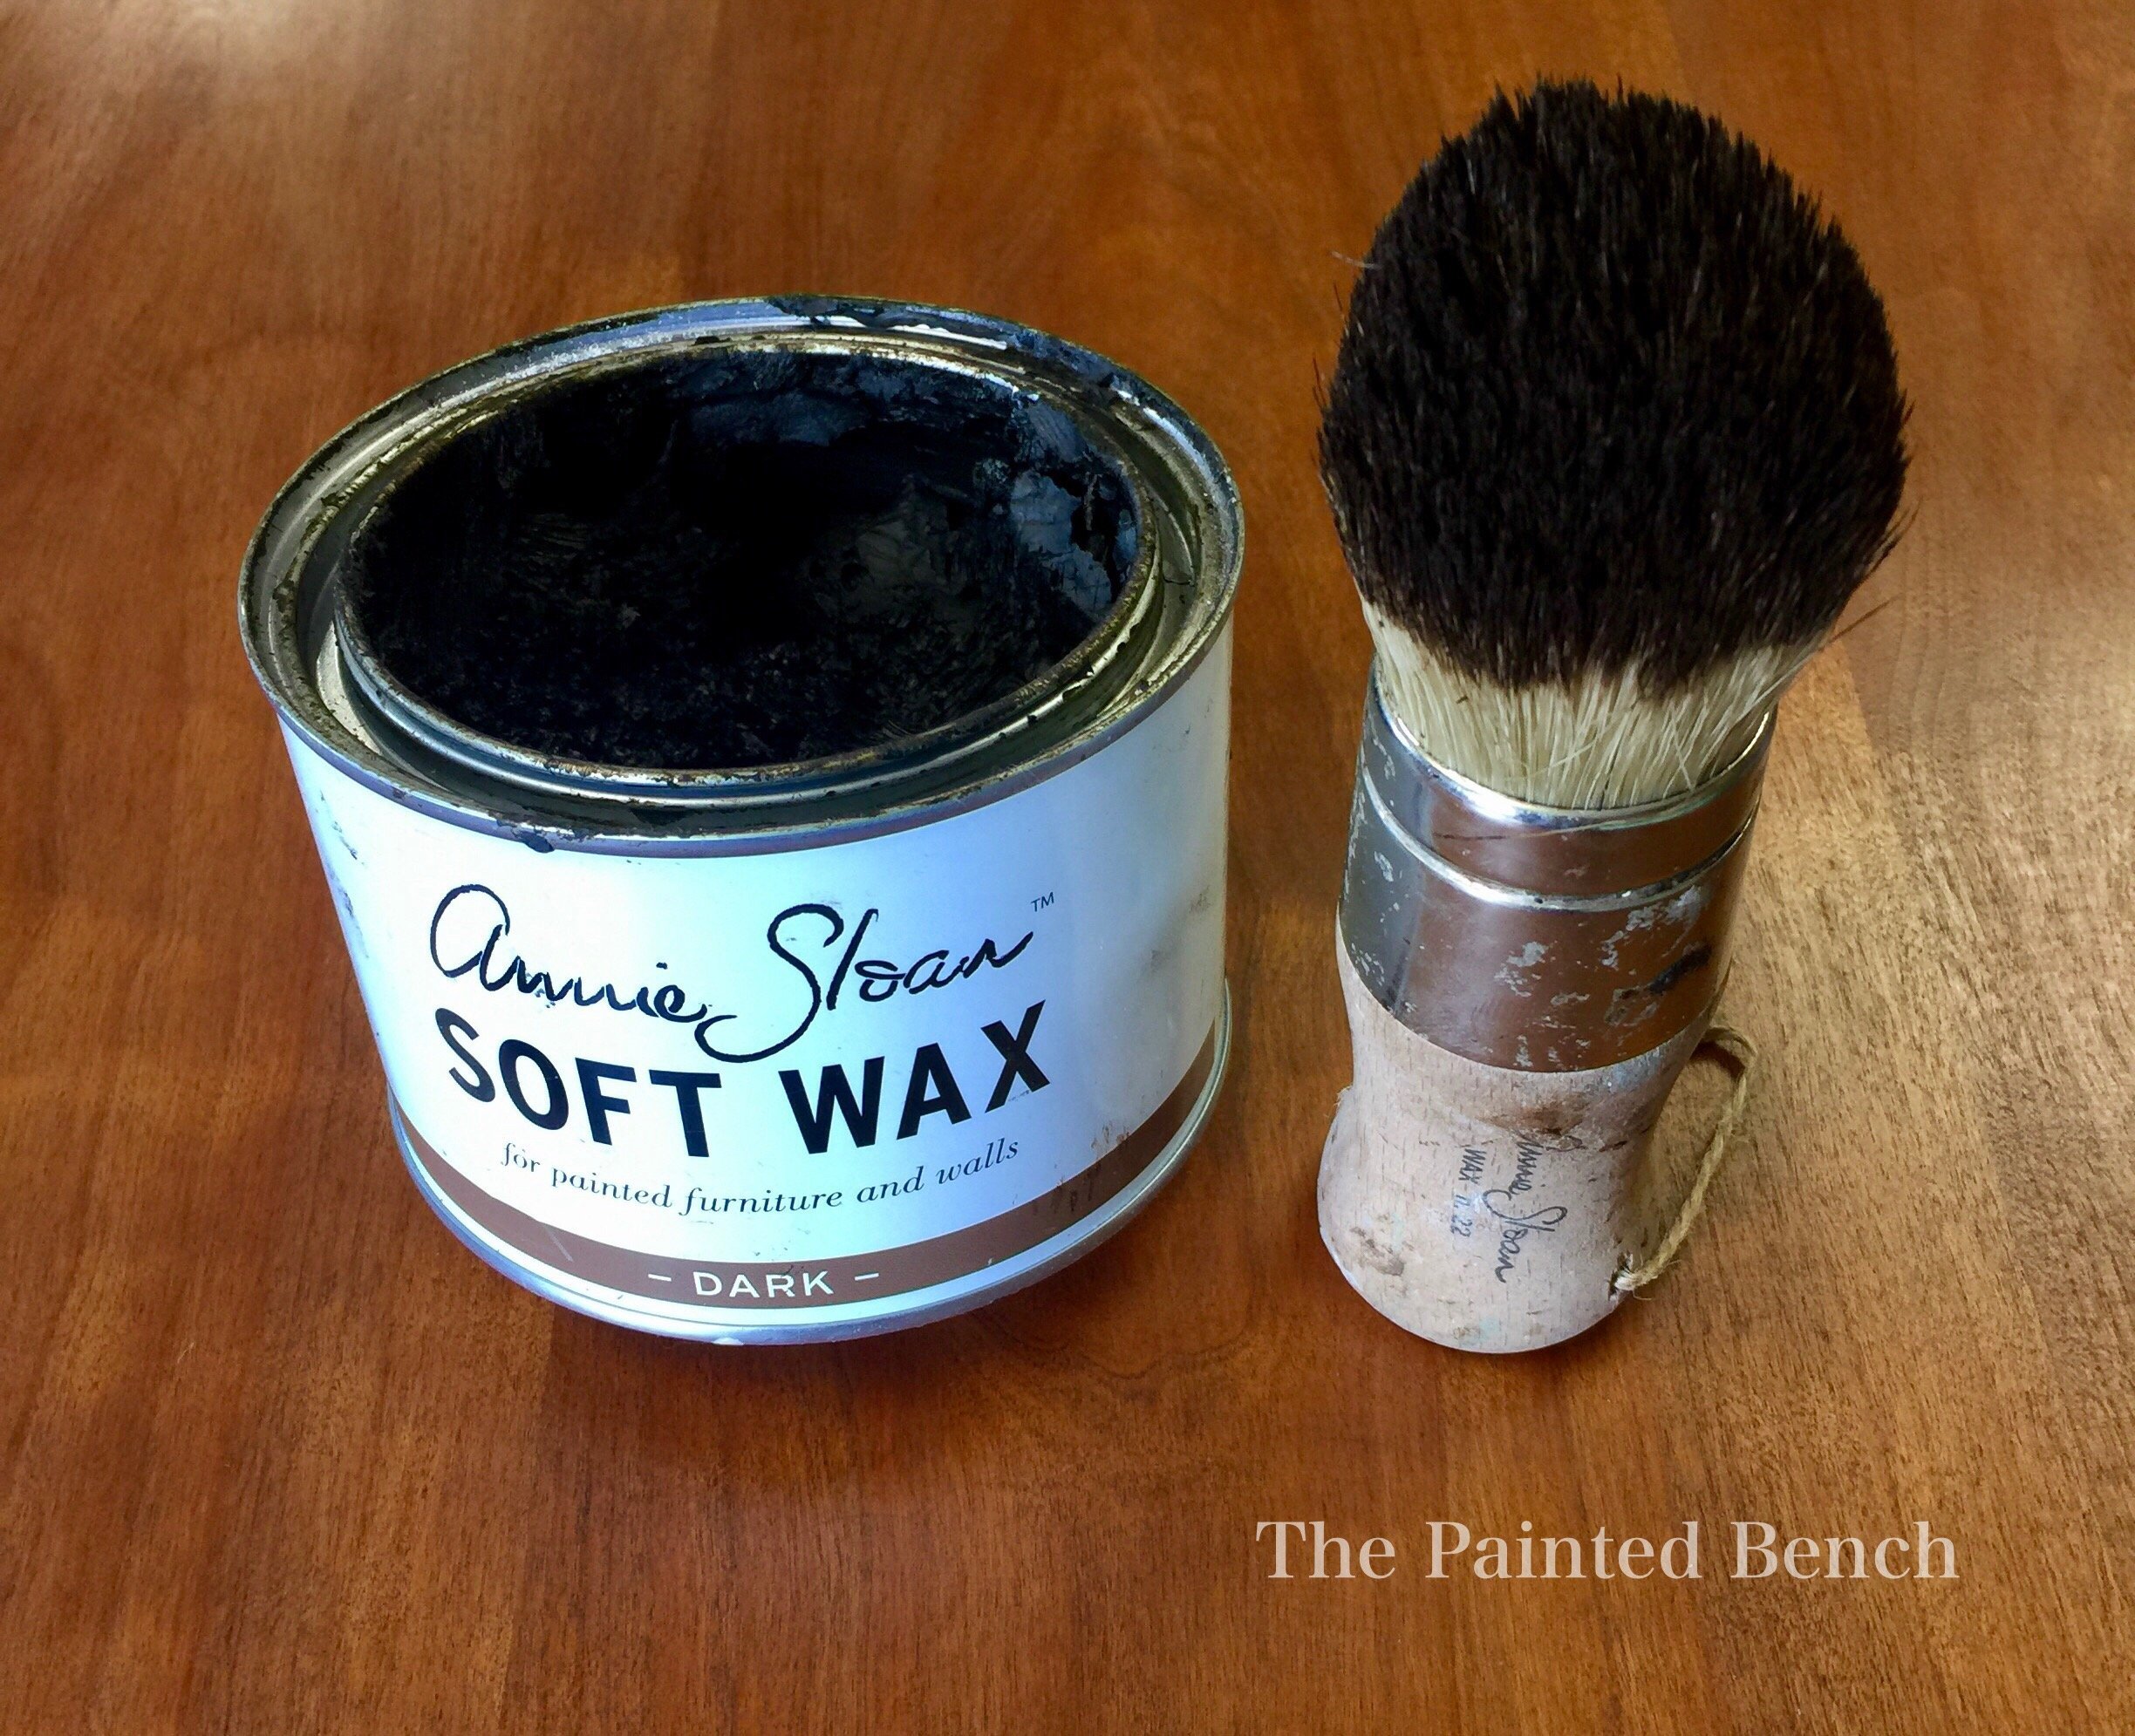
I followed that step up with Annie Sloan’s Clear Wax and a little Dark Wax for a lovely patina.  I used the wax to soften the ink before it was dry because I felt it was too stark.  I would normally wait a few hours at least before waxing over IOD Ink.  Be gentle when you’re waxing or topcoating where you have inked to make sure it won’t smear.  If it isn’t dry wait till the next day to continue.

Tada!  I love how this turned out!

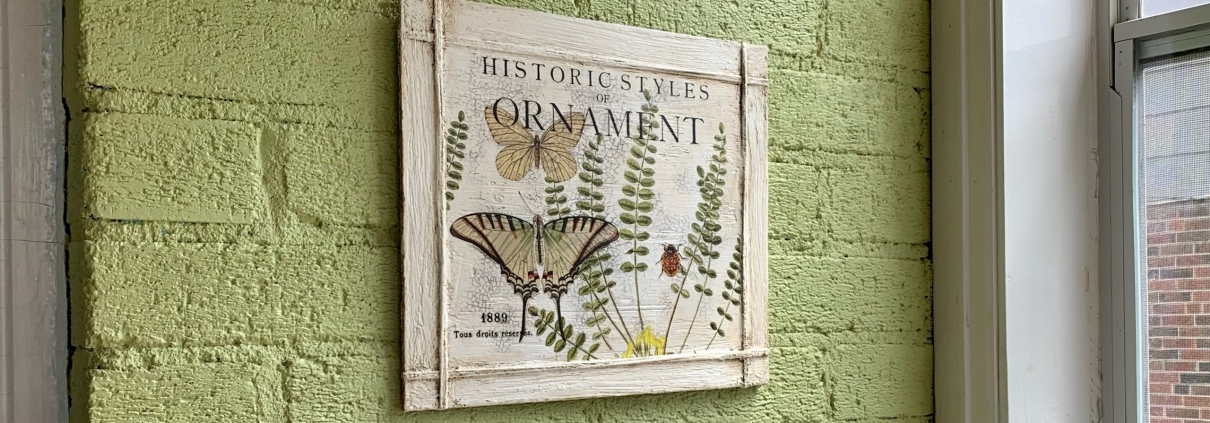
If it ever warms up enough to use our screened porch I will enjoy this little corner while I have my morning coffee!

All of the products used in this project are available in our online shop for curbside pickup or for shipping across Canada.  Once we get things back to normal we’d love for you to stop by and visit our shop if you’re in the neighbourhood.  We are looking forward to opening our doors to customers, hopefully very soon!


Happy Mother’s Day and thank you for taking the time to read this.  I’ve got the next piece ready for transfers, I can’t wait to get it finished!

Happy painting everyone!

Melanie

Upcoming Workshops at The Painted Bench

The Painted Bench

Shabby & Chic & Everything Neat


What’s Happening at The Painted Bench?

We always have a good selection of workshops using Annie Sloan Paint on offer at the shop, in August we’re going to kick things up a notch!

Make It Your Own with Annie Sloan

As always we will be running our cornerstone workshop, Make It Your Own with Annie Sloan.  This is where we teach you the basics of Chalk Paint™ and how to use this wonderful paint to create your own masterpieces.  In three short hours you will learn several techniques, many ways to distress, stencilling, and finishing with Annie’s Soft Wax.

Register here

Creating with Chalk Paint™ & Iron Orchid Designs Transfers & Moulds

This is one of the newest workshops we have on offer at the shop.  Annie Sloan Paint and Iron Orchid Designs products are a match made in heaven!  First off we will be using two of the most popular IOD design items, transfers and moulds to create some fabulous pieces you will love to display in your home.  Besides Chalk Paint™ we will be using Craqueleur and Waxes for a beautiful old world finish.  Taking furniture upcycling to a whole new level!

Register here

Decoupage & Craqueleur Magic Workshop

This is a workshop that we’ve offered for quite a while and we think its time to change things up a bit!  In this class we use our wonderful Monahan Papers and Chalk Paint™ to create a lovely panel.  We will be adding a new aspect to this class with Artisan Enhancements plasters.  Learn how to create raised stencils with fine stone or pearl plaster, finishing off with Annie Sloan’s Craqueleur and Black Wax. Advanced techniques made easy!

Register here

Paint a Paddle Workshop

This has been our most popular new workshop of the summer!  This hot trend is sweeping the design world and now you can create your very own.  You will be using Chalk Paint™ by Annie Sloan to paint a beautiful Canadian made paddle.  Because the paddles are unfinished you will be using Dark Wax to create a lovely patina.  Let your imagination be your guide!

Register here

Registration Made Easy

We recently revamped our Events Calendar to include online registration right here on our website.  In addition to calling the shop to sign up, you can simply click on the link in the calendar and register at any time that is convenient with paypal or your credit card.

Are you looking for a different idea for a bachelorette party, birthday gathering or girls night out?  We’d love to host your event!  Any one of our workshops can be booked as a private event.  Call the shop for details!  289-389-9281

Our workshops fill up fast so its a good idea to register soon!

Happy painting everyone!

Melanie

You can find your local Annie Sloan Stockist here

Purchase Chalk Paint™ here and Annie Sloan Products here

What I Love About Canada

The Painted Bench

Read more

Colour Trends of 2017 – Part 1

The Painted Bench

Shabby & Chic & Everything Neat


We’re Keen on Green

For those of you who don’t already know Pantone’s Colour of the Year for 2017 is a vibrant spring inspired hue called Greenery. Pantone describes the colour as: “Illustrative of flourishing foliage and the lushness of the great outdoors”.  This was the inspiration for my next piece.

Take a Deep Breath!

I know what you might be thinking, green is bold and bold can be scary! When it comes to interior design and painting furniture many of us tend to stick to muted, neutral tones such as Annie Sloan’s Old White or French Linen.  We use brighter colours only as accents. There is no harm in remaining neutral, these colours are classics and will never go out of style.

Greenery, like the Chalk Paint™ colours Antibes, Florence or Amsterdam Green, challenges us to step outside of our comfort zone and get inspired. Do not underestimate the power of positive change and nature’s ability to improve our well being. Bring the outdoors in.

Botanical Inspirations

While I was inspired by this luscious shade of green I was equally intrigued by a book of botanical prints I had recently acquired. I knew that I could create something very special with this combination.

I used several colours to make my version of Greenery. Olive, Amsterdam Green and Antibes with a touch of English Yellow was just what I was looking for.  Perfect for the greens in my prints.

Most of us wouldn’t paint every piece in a room like this but you have to admit its a perfect accent colour.

Can’t Commit?

If you’d like to get that pop of nature into your room but you just can’t make the change from your neutral pieces, all is not lost!  Designers have embraced green this year in all kinds of ways.

Exotic prints with lush, green palms, tropical-pink flamingos, yellow pineapples and large scale florals will help create a jungle-chic motif in strong bright colours.

Cacti and succulents are very trendy right now. Introduce them into your space with pops of blue and pink. We highly recommend Annie Sloan’s Scandinavian Pink, Aubusson Blue and Arles layered for a more muted look.

From lime to emerald, this hue will work throughout your home in so many fun ways. Dare to be different, go green and make a bold statement this season!

Happy painting everyone!

Melanie

You can find your local Annie Sloan Stockist here.


How to paint a dresser with Annie Sloan Paint

The Painted Bench

Shabby & Chic & Everything Neat


This beautiful dresser landed in our shop purely by chance. Hubby and Carolyn were out picking up a white French provincial bedroom set when Carolyn spied this beauty in another room. Before I had a chance to say YESSS I want it, it was on the truck!  I knew right away Chalk Paint™ by Annie Sloan would be perfect for repurposing this lovely piece.
Before

At first glance I knew i wanted the top to be stained, there were many problems with the finish, so before the fun part started I had to strip and sand. This didn’t take long with a stripper we carry in the shop.  Dad’s Easy Spray works incredibly fast and I love the attached spray bottle that makes the job as neat as can be.

Colour is Everything with Annie Sloan

As soon as I laid eyes on this beautiful dresser I knew I wanted to use Annie Sloan’s Florence. This fabulously rich teal green Chalk Paint™ makes such an elegant statement, I just couldn’t resist!
Chalk Paint
This piece didn’t need any fancy techniques, its elegant style and a simple smooth application of Annie Sloan’s fabulous paint with the added interest of some Chalk Paint™ Dark Wax would be perfect. This is the beauty of Annie Sloan’s Paint, any kind of finish is possible from rustic chippyness with loads of texture to a sophisticated contemporary look!

This was a quick two coats of paint, no distressing, finished up with a coat of Chalk Paint Clear Wax followed by a touch of Dark Wax.

I usually paint the inside of the drawers, and this time I took inspiration from the opposite side of the colour wheel and chose Scandinavian Pink. It is such a beautiful colour and along with a quick stencil it gave that little bit of wow when the drawers are open.

Surprise Finish with Annie Sloan Wax

Remember that stained top I talked about earlier? Well here’s a little surprise for you. I didn’t use gel stains or polyurethane finishes. All I needed from my arsenal of Annie Sloan’s products was a quick application of Chalk Paint™ Dark Wax. Dark or Black wax is perfect for finishing raw wood as an alternative to stain and poly.  One or two coats of wax wiped back to a beautiful sheen literally takes minutes to complete.

Finally it was time to put that gorgeous hardware back in place. In no time it was out on the floor ready to head to its new forever home!

You Can Do It Too

This was such an easy look to create and it’s definitely something you could accomplish as a beginner. Learn how simple it is to use these and other fabulous techniques to make your piece your own. Join us for one of our workshops! Sign up online to save your spot.

Happy painting everyone,
Melanie

P.S. This piece didn’t last long. In fact, is was gone before the day was out! Now we’re on to our next adventure in Chalk Paint™.

You can find your local Annie Sloan Stockist here.

Get a Bandaid on that Bleed Through!

It doesn’t happen often but every once in a while we will get the dreaded “Bleed Through” on a piece when we are painting with Chalk Paint™ by Annie Sloan. The most common problem is usually pine knots but sometimes you will get pink from old mahogany stain, yellow or brown splotches from walnut or little brown spots from oak.  Now sometimes we can ignore those brown areas if we are going to paint something rustic and we will be using Annie’s Dark Wax but if you are looking for the clean classic lines of Pure White the last thing you are looking for is this!

IMG_6455

A mix of Old White and Pure White Chalk Paint™ over mahogany stain.


IMG_6456

This is the point where our trusty shellac comes to the rescue because applying another coat of paint at this point will simply amount to two coats of pink paint instead of one.

IMG_0034

This is the brand that we use and is available in the store and in our online shop and has never let us down!

Most of the time one coat of shellac is enough, it only takes minutes to dry and you can apply your next coat of Annie Sloan paint.  In this case that mahogany stain was stubborn!

IMG_6457

After one coat of shellac


In our experience this type of unstable stain is the most stubborn and generally we will apply two coats of shellac at a time but in this case we thought it was a good time to experiment and we knew we would be applying multiple coats of paint.

IMG_0021

After two coats of shellac


After two coats of shellac between coats of paint we are seeing good results.  And our final coat of paint is free of pink stain.

IMG_0031

This was a particularly pesky bleed through and most of the time one coat of shellac will be sufficient, just be confident that all is not lost.

A few things to be a aware of…shellac has a shelf life and should not be stored in an overly cold or hot place. There is a date code on the lid of this brand and I like to stay within a one year time frame although it is guaranteed to stay stable for three years.  The code starts with an S with the number following being the last digit of the year of manufacture.  In 2017 I would look for and 6 or 7 but a 5 should still be good.  Unless you use a lot of shellac buy small, a pint will go a long way.

As always if you have any questions about Annie Sloan Paint and products be sure to stop in the shop or give us a call.

Happy painting everyone

Melanie


A Lady Never Reveals her Age: But Your Furniture Does

Learn How to Date Your Antiques With a Few of These Simple Tips and Tricks

Let’s talk joinery, some of you may be able to spot authentic antique joint work from a mile away, others can’t tell a waltz from a tango, err… or in this case an antique from an… Ikea? It’s all about the intricate details of craftsmanship that expose history and more importantly tell a story. This blog will give you a brief overview of the different styles of joinery, once you’ve learned what to look for, take a few minutes and study the furniture around your home, you’ll be amazed at what you find when you look a little closer.

Knapp Joints: Also known as Pin & Cove, a Pin & Scallop or Half Moon, this is a visually unique style of antique joinery, its typically very strong and can be mass-produced in a factory using a special type of machinery. What makes the Knapp joint so special is that it was only used for about 30 years, from 1870 until 1900. This joint is the first known mechanization for making drawers in the industrial revolution age until eventually being replaced by a machine that cuts dovetails.

fullsizerender-1-copy-3An old washstand that we’ve painted at the shop. I just love the look of this joinery and try not cover it when we’re painting.

fullsizerender-1-copy-5


The History:

The Knapp joint was developed during the late Victoria Era in post Civil War United States. Patented by Charles Knapp of Waterloo, WI in 1867, the Knapp Joint was a huge breakthrough for the furniture industry; machines called routers made circular cuts in wood far quicker than by hand. Large-scale furniture producers were now constructing high quality furniture faster than any small shop was that still relied on hand tools.

fullsizerender-1-copy-7 A Pin & Scallop Joint…too pretty to paint over

fullsizerender-1-copy-2Typical Pin & Scallop drawer joinery on an Arts & Crafts Style dresser.

img_4638As you can see Pin & Scallop can be found on many different styles of furniture

img_4639-1

Dovetails: this joinery technique is most commonly used in woodworking joinery including furniture, cabinets, and traditional timber framing. In Europe the dovetail joint is also referred to as a swallowtail or fantail joint. A series of pins cut to extend from the end of one board interlock with a series of tails cut into the end of another board. Once glued, a wooden dovetail joint requires no mechanical fasteners.

fullsizerender-1-copy-8A beautiful old washstand sporting more modern machine made dovetail joinery

The History:

One of the oldest forms of joinery, the dovetail is said to pre-date written history. Some of the earliest known examples of the dovetail are in furniture entombed with mummies dating from First Dynasty of ancient Egypt, as well the tombs of Chinese emperors. 
img_4655 A very old chest using hand crafted dovetails in the construction of the body

img_4658Dovetails used in the construction of an Arts & Crafts Style Cupboard

Now that you’ve learned what it is you should be looking for, you must be wondering where you’ll find these distinctions. Looking at the bottom or back of a piece, or inside its doors and drawers, can provide important clues about whether or not a piece of old furniture was machine cut or crafted by hand. Most handmade pieces will show some irregularities to the surface such as minor nicks indicative of a hand plane being used to smooth out the wood, and this is sometimes even more evident on the back than on the finished front surfaces.

We’ve only scratched the surface (no pun intended) when in comes to dating your furniture, follow our blog and continue to learn helpful tips and tricks from your friends at The Painted Bench!

logo

The Painted Bench on the Road

Last week my hubby and I took a much needed week off and hit the road to Florida to take in some sun, watch some Blue Jays baseball at Spring Training Camp and of course visit some Annie Sloan Stockists! We visited 4 incredibly talented Stockists while we were in the Clearwater area, every one of them should be on your list of must visits!

The first stop we made was to Marcotte’s Salvage. Jenni and I have trained together twice and I love spending time with her, it was a real treat to finally visit her shop!

image

image

image


The next stop we made was to Buster’s Antiques located in an area populated with antiques, galleries and great food! Plan to spend a few hours in this neighbourhood and wear your walking shoes!


image

image


With a couple of Blue Jays games under our belts…

image


we were off to visit The Feathered Nest which just happens to be in a lovely downtown shopping district within site of the ocean!  Did I mention how sunny and warm it was????


image

image


Last but certainly not least on our list is a shop tucked away from everything, and if you blink you will cruise right on by and not even know missed it.  Robyn Story Designs is definitely worth turning around for!!!!

image

image

image


image


I hope you’ve enjoyed our little tour of a few of the Annie Sloan Stockists near Clearwater Florida.  If you’d like their details and locations of these or Stockists near you or along your travels visit Annie Sloan’s website!

Happy Painting Everyone

Melanie

Holiday Hours

I’d like to take this opportunity to wish you and your families a very Merry Christmas and a Happy New Year from all of us at The Painted Bench.

hours